How to use EdTech Impact's Zapier integration
Currently, we offer our Zapier integration only to our Pro Plan customers and on an invite basis. If you would like to receive the invite to set up the integration, please contact hello@edtechimpact.com.
Step 1: Invitation email
You will receive an invitation email from Zapier.
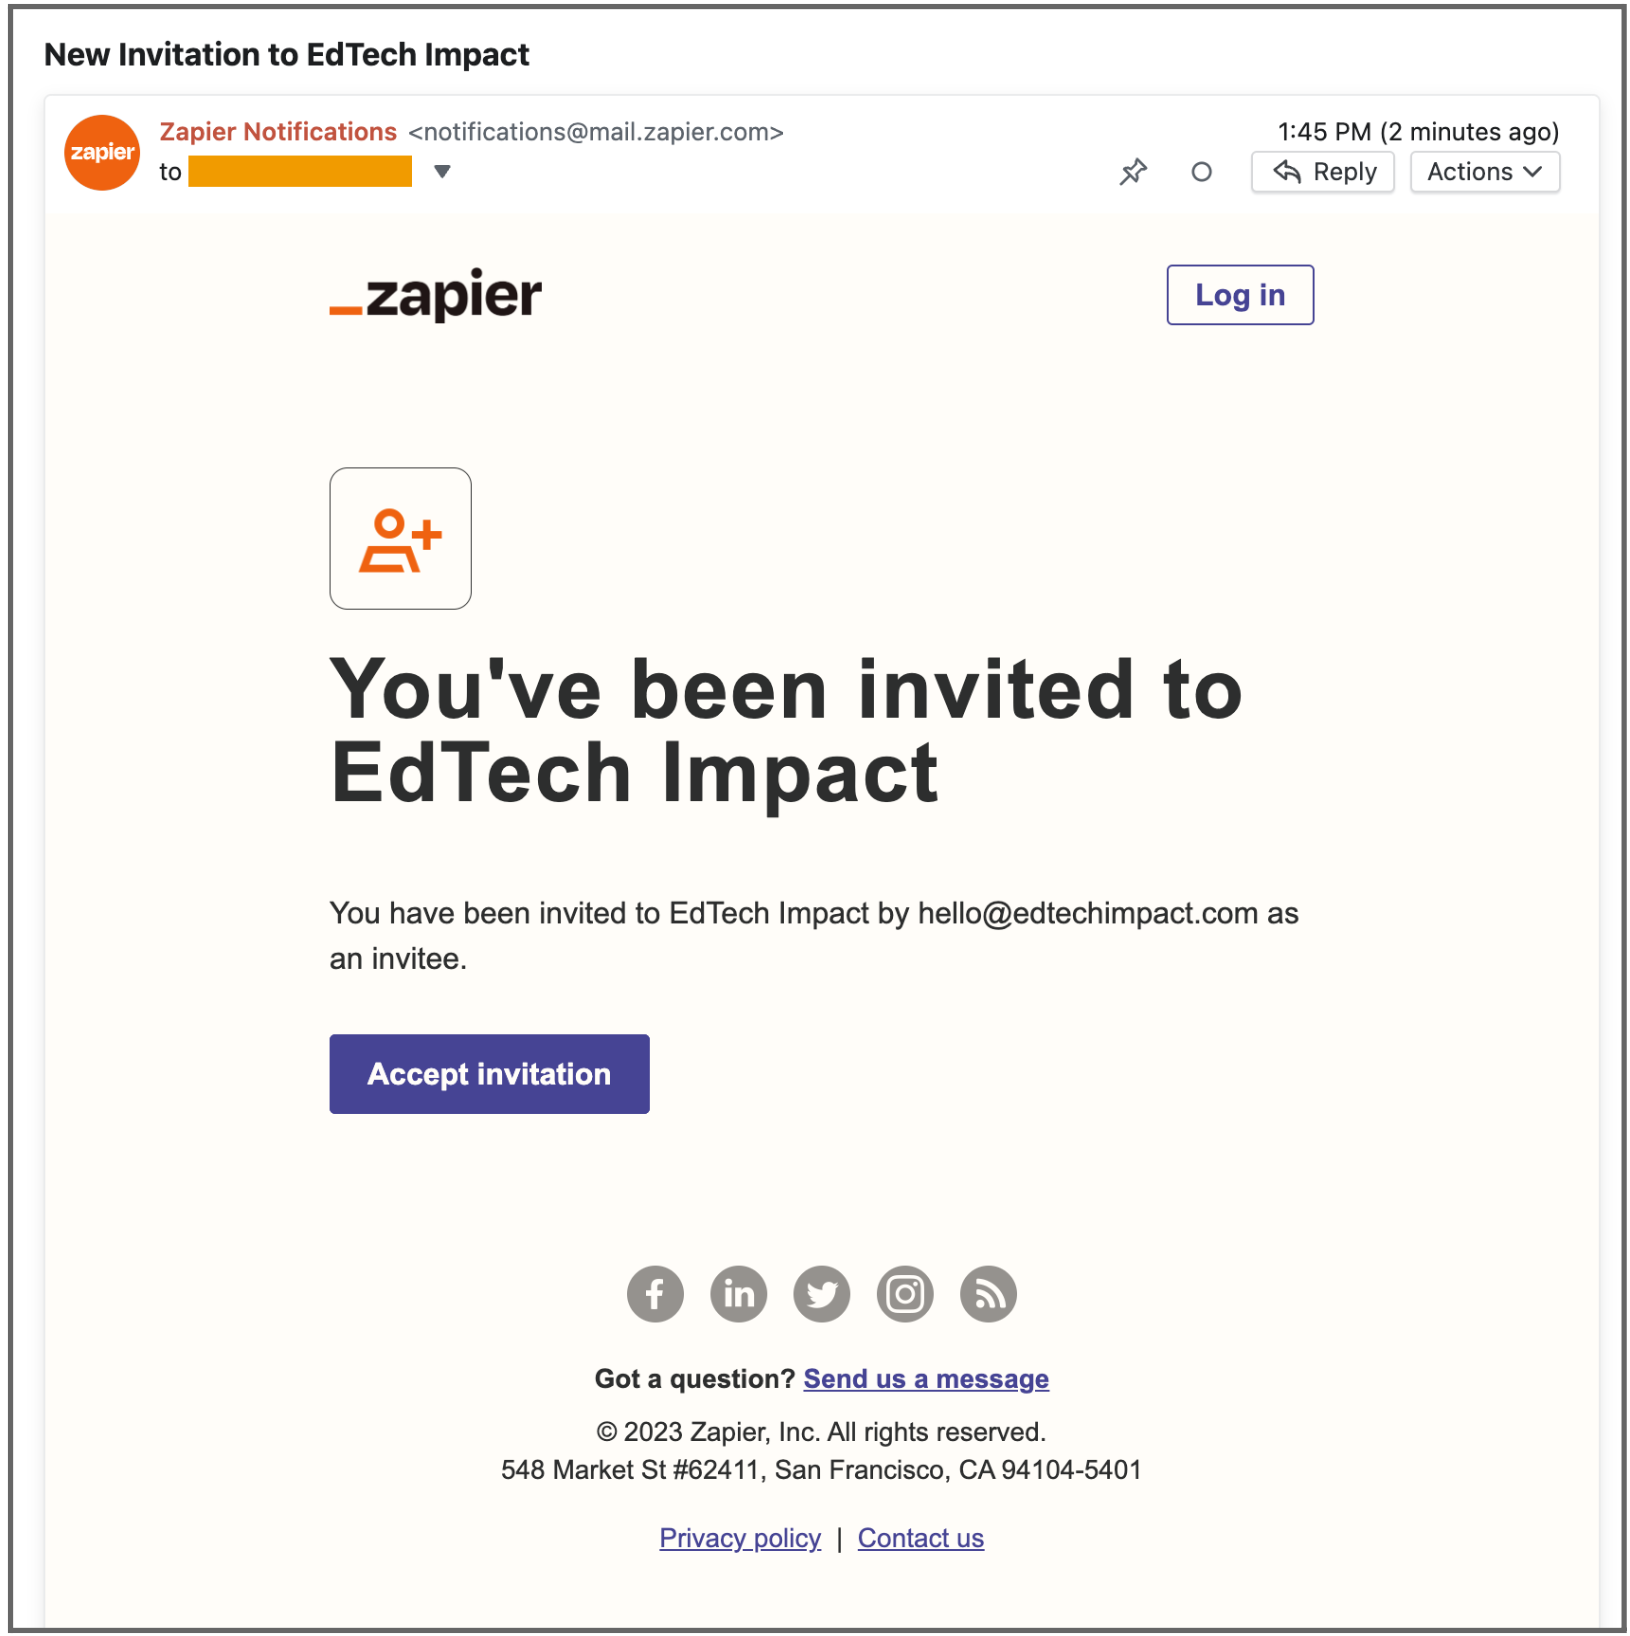
Click “Accept Invitation” to continue.
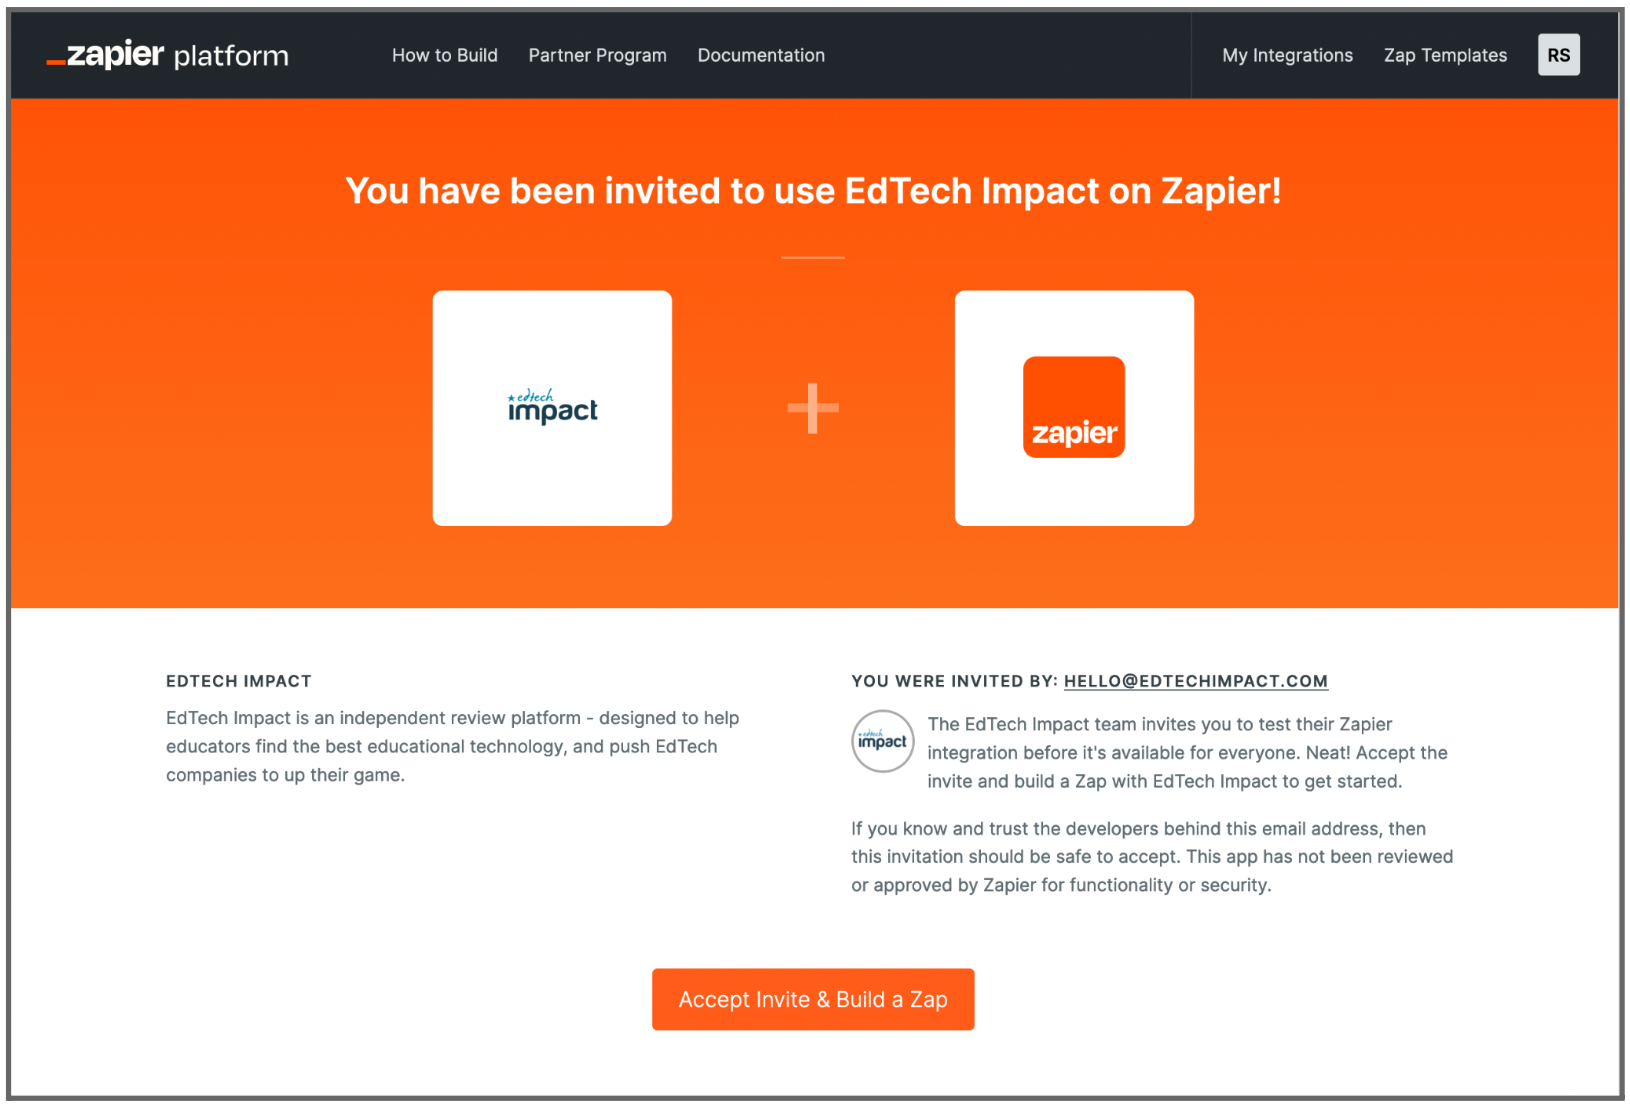
Step 2: Accept Invite
Note that you may be asked to log in, if you are not already logged in, before being able to accept the invite.
You will be redirected to your Zapier dashboard:
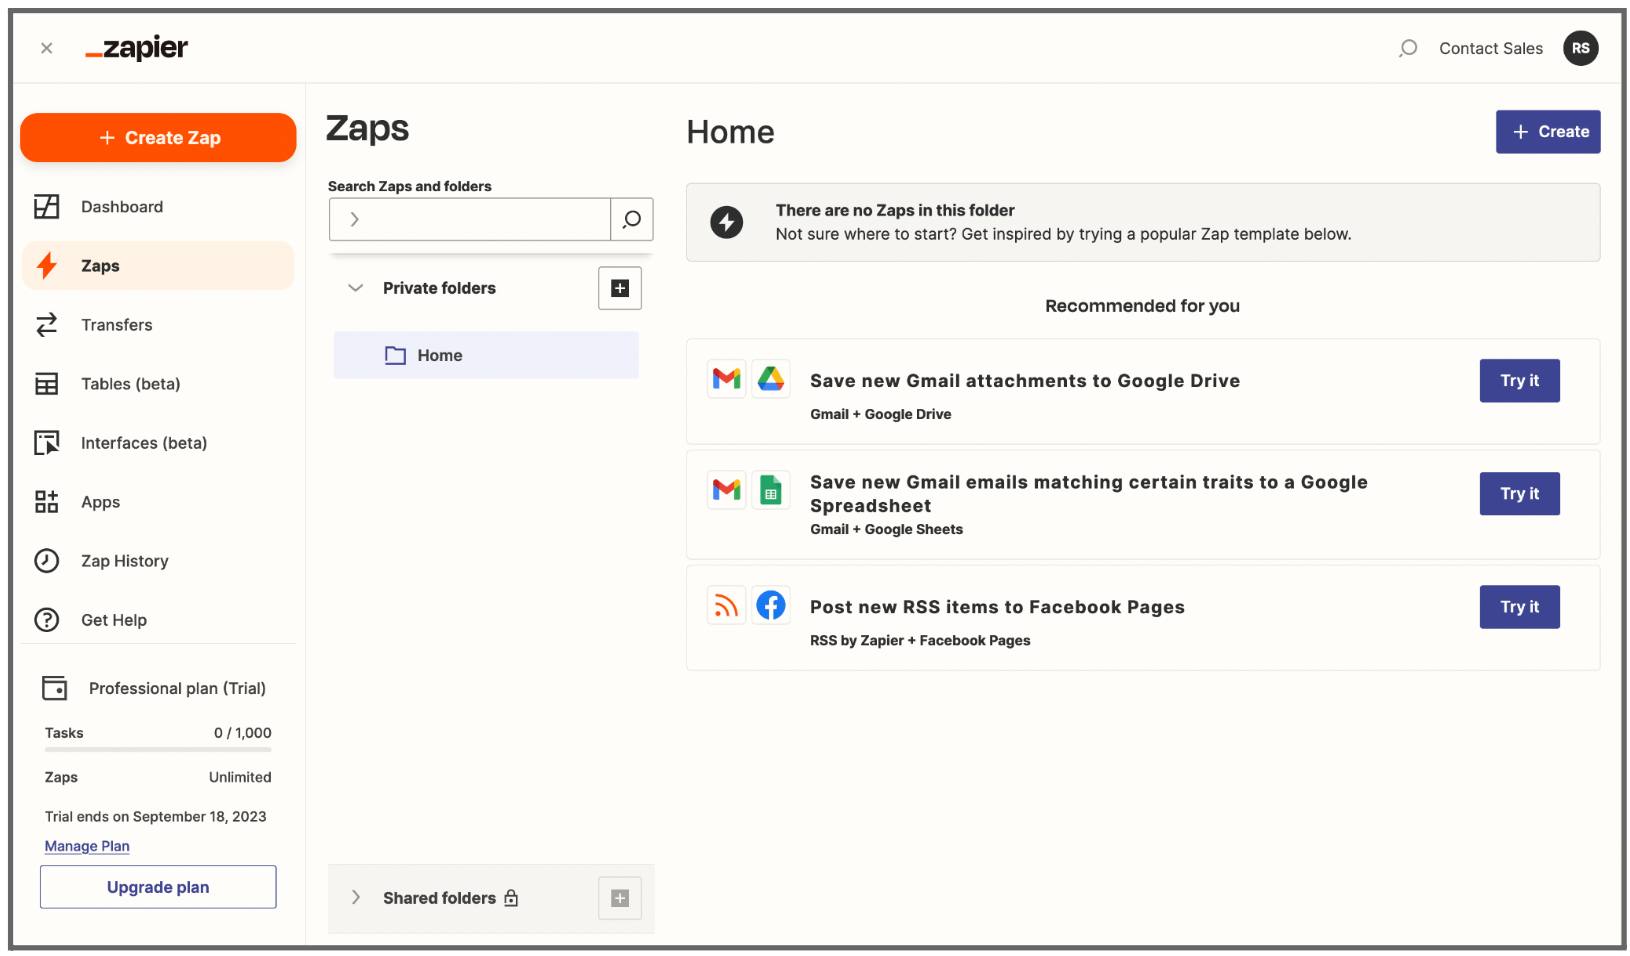
Step 3: Build a Zap!
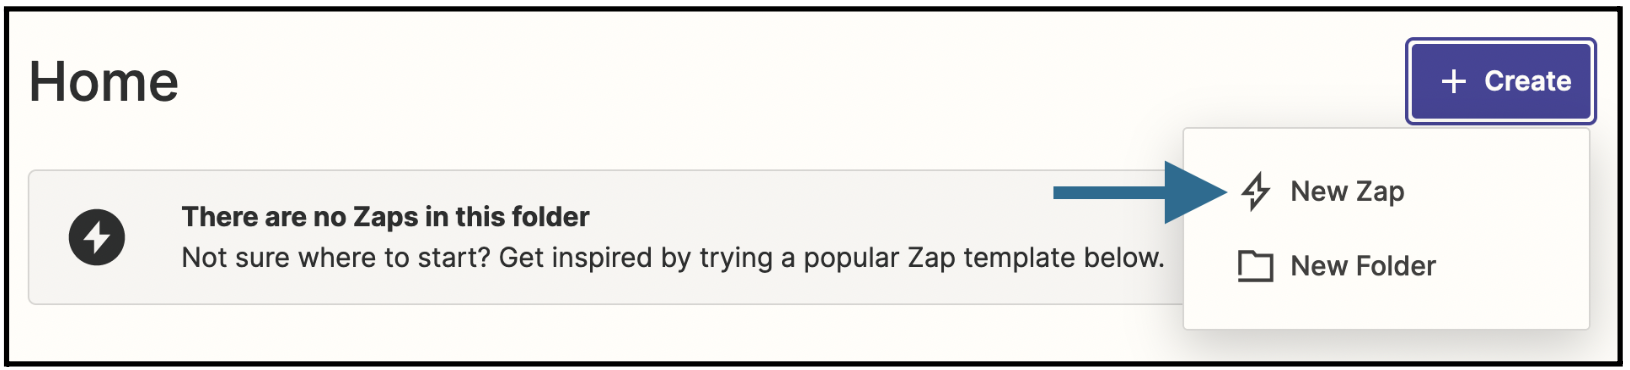
3A: New Zap
On your dashboard, look for the “+ Create” button and hit “New Zap”:
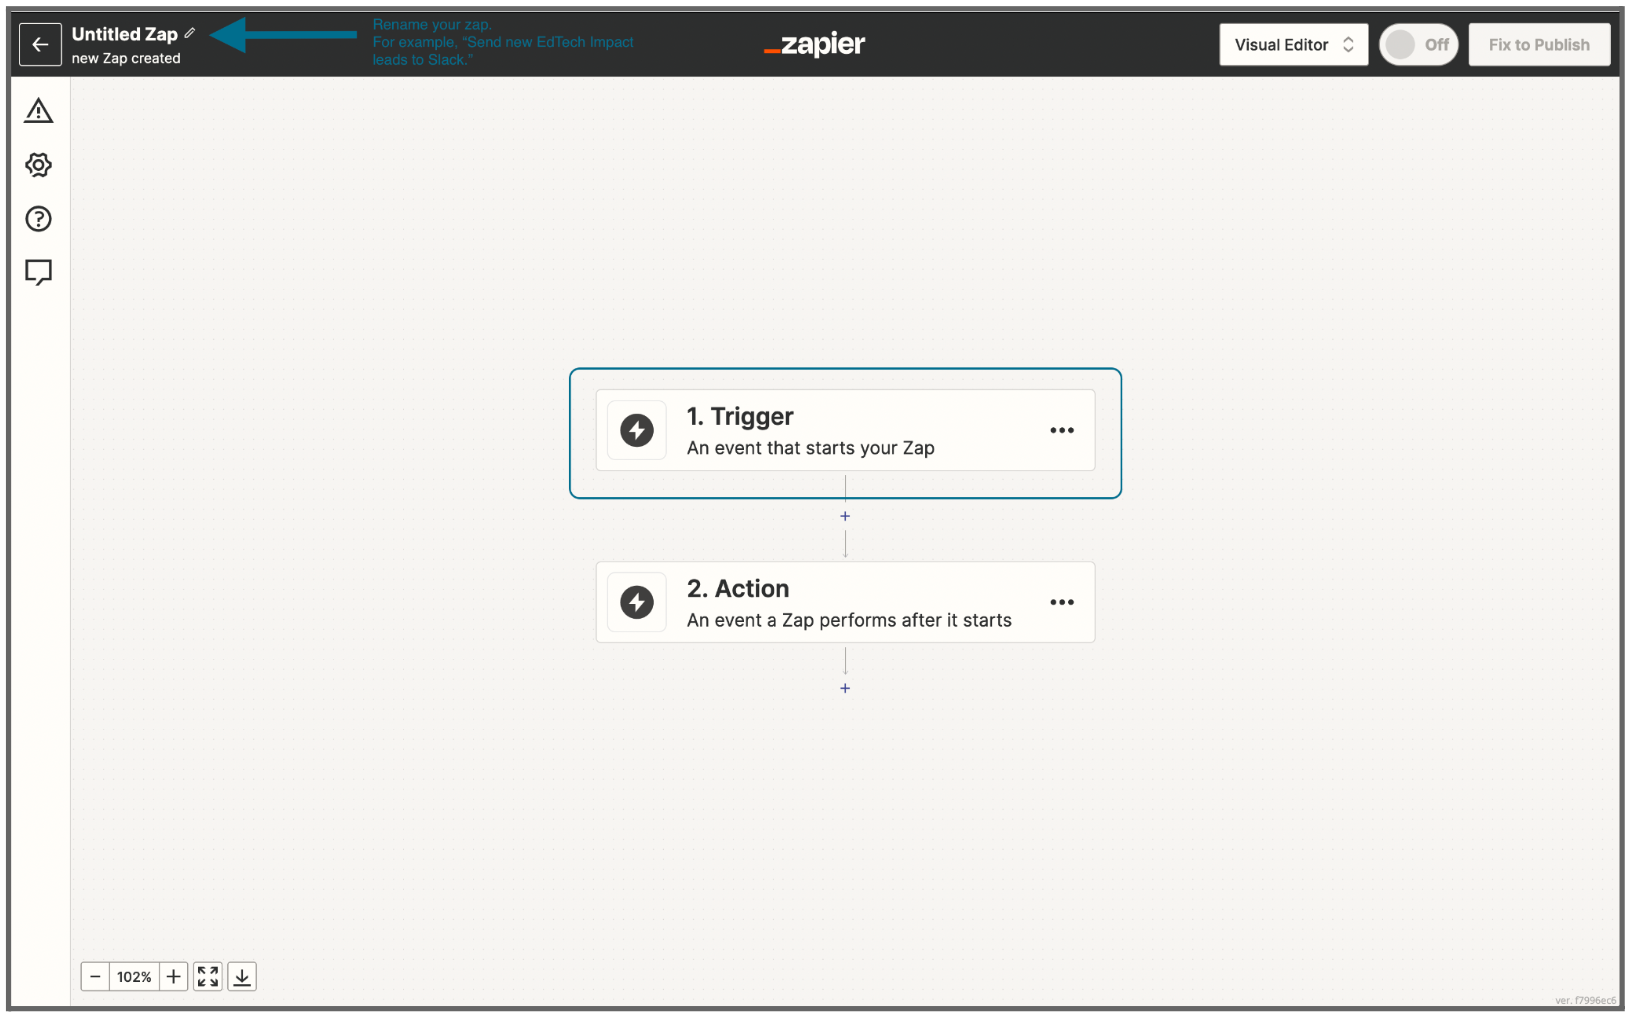
You will be taken to the Zapier’s Zap Editor. Feel free to give your Zap a name by tapping the pen icon in the top-left corner.
3B: Trigger
To begin creating the zap, click on “Trigger.”
Tip: Rename your zap, e.g. "Send new EdTech Impact leads to CRM".
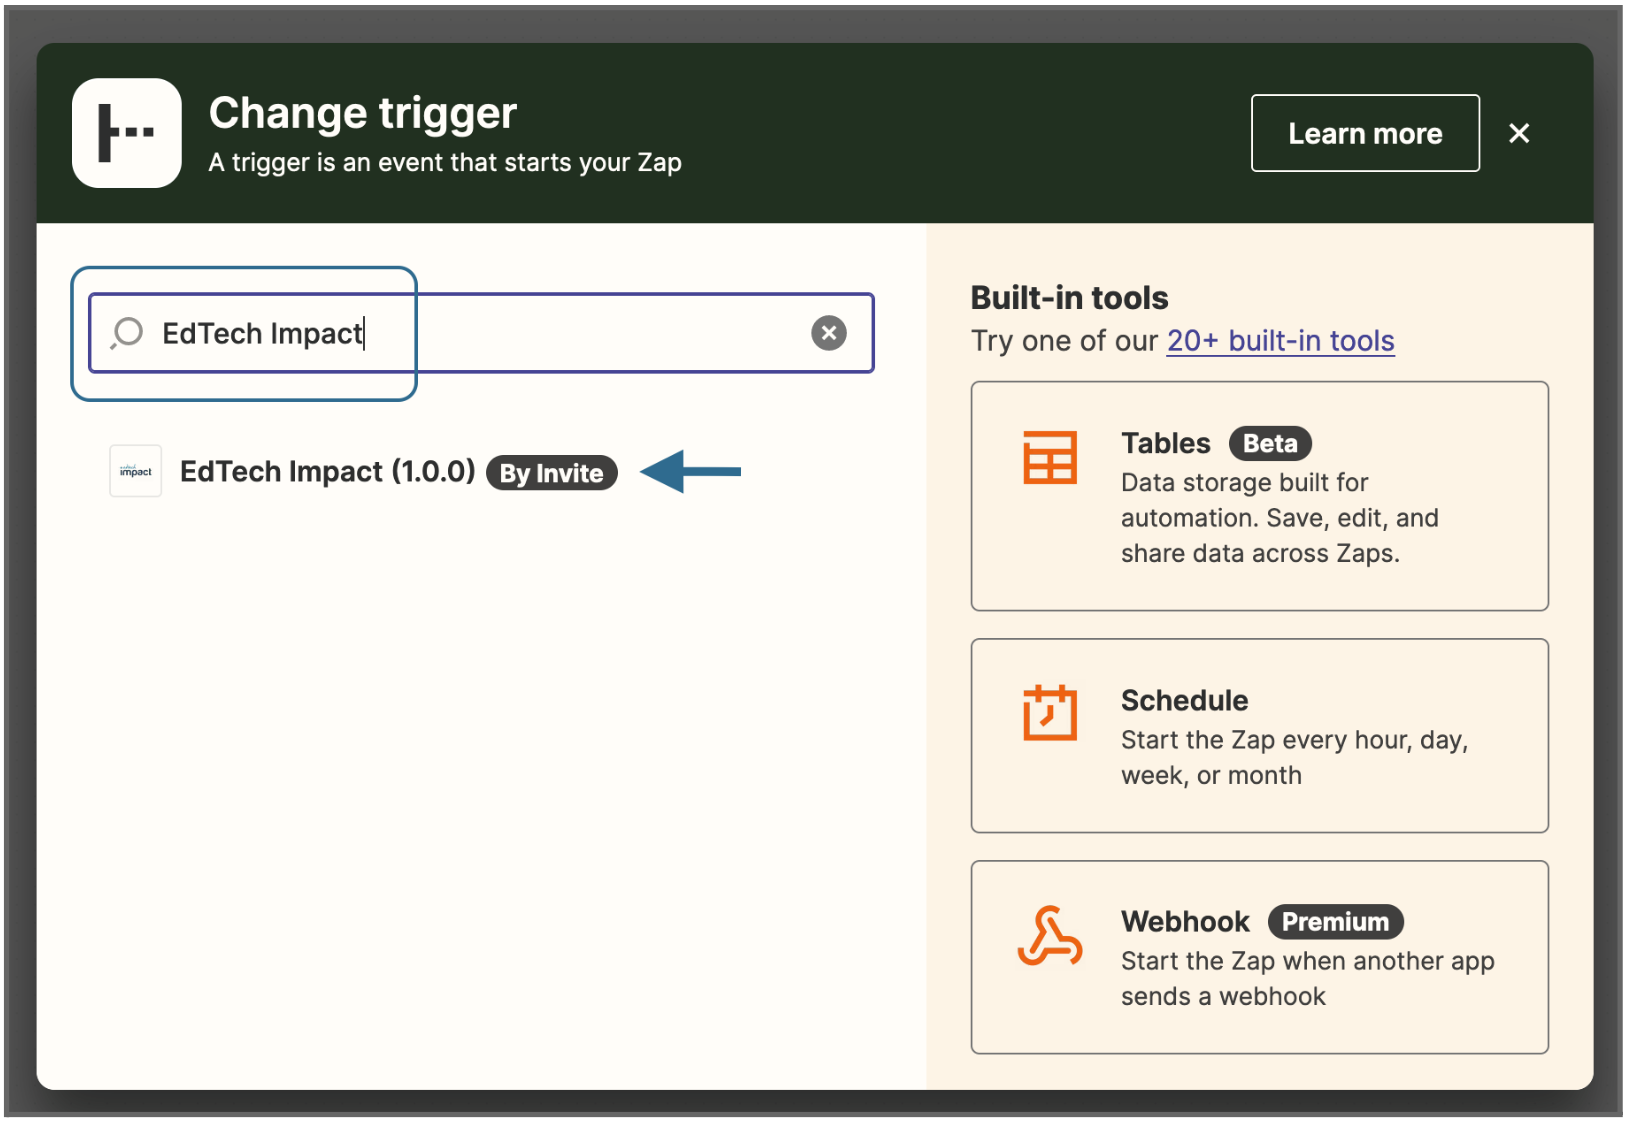
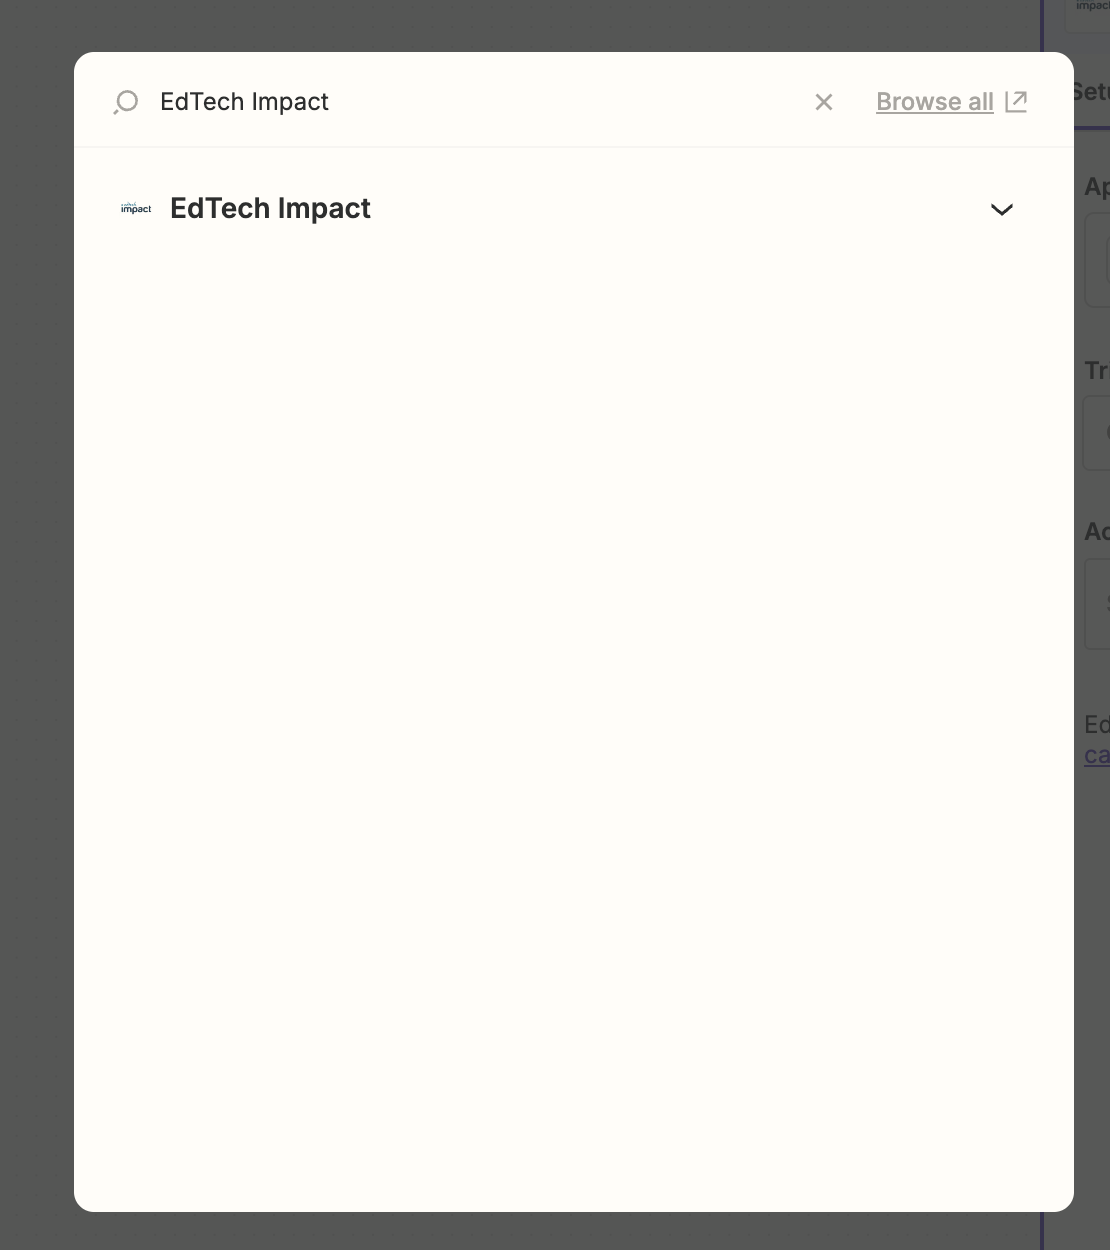
You should see a pop-up asking you to select an app.

In the pop-up, start typing “EdTech Impact” and you should see our app ready to integrate.
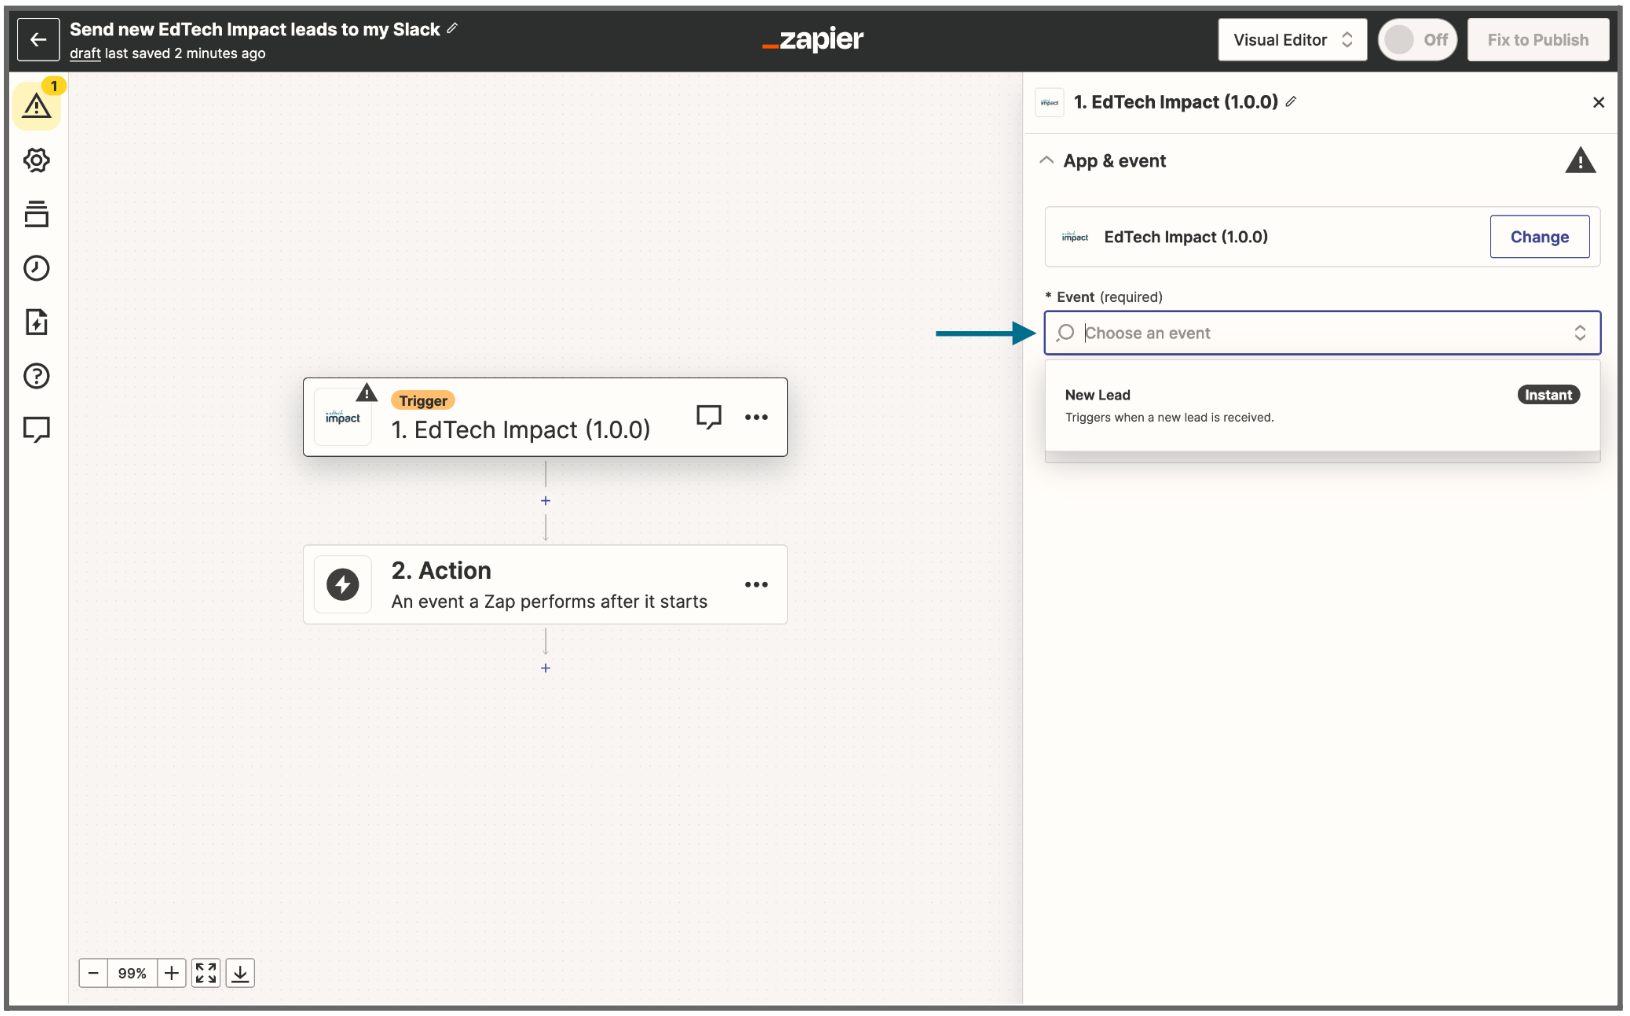
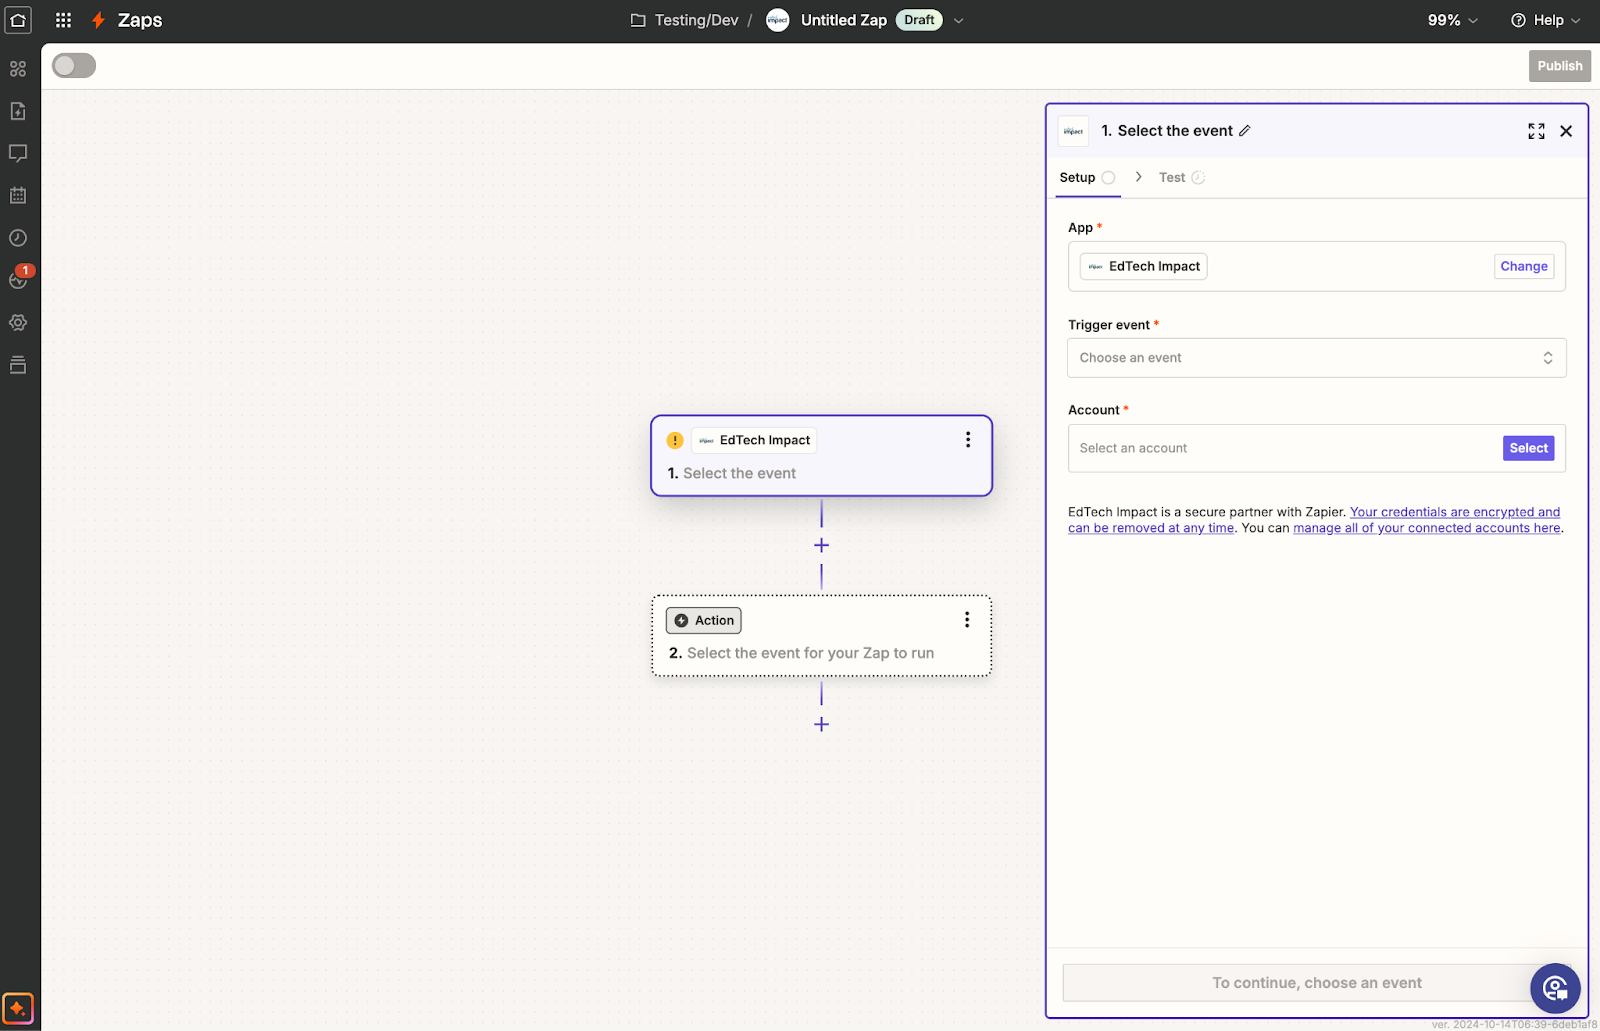
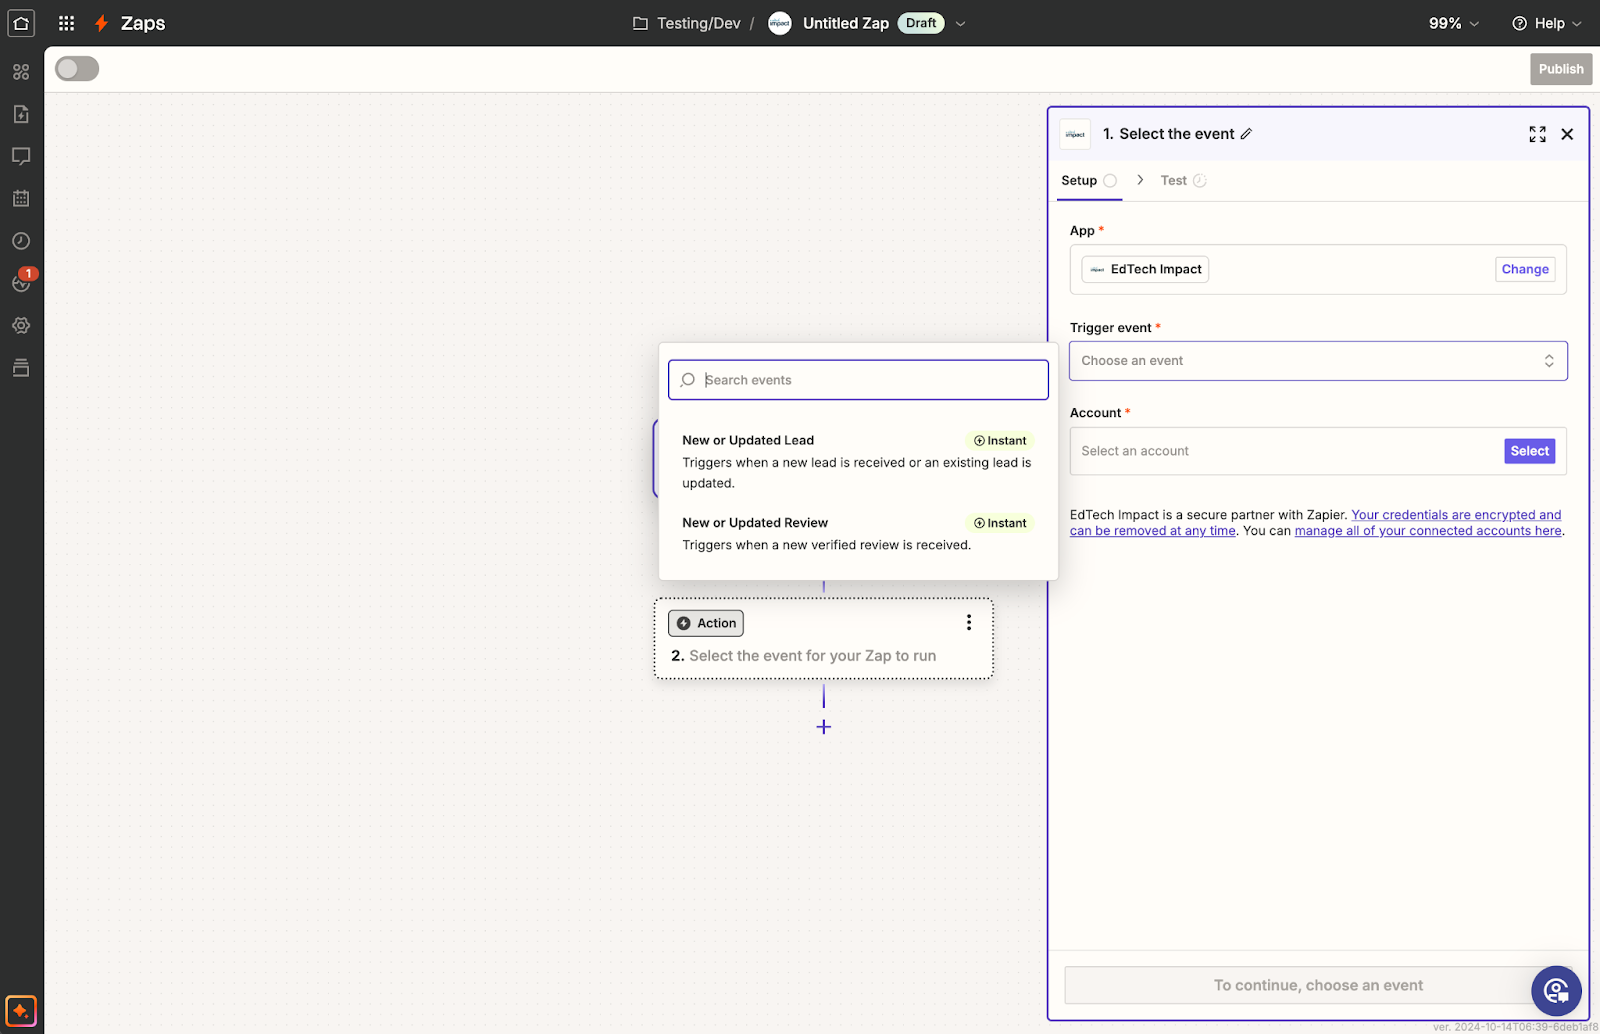
Selecting EdTech Impact should then open up a drawer on the right hand side of the screen. Clicking on the Event field will show you “New Lead.” Select it and press continue.
3C: Connect your EdTech Impact account
At this point, you need to establish a link between your account on EdTech Impact and Zapier.
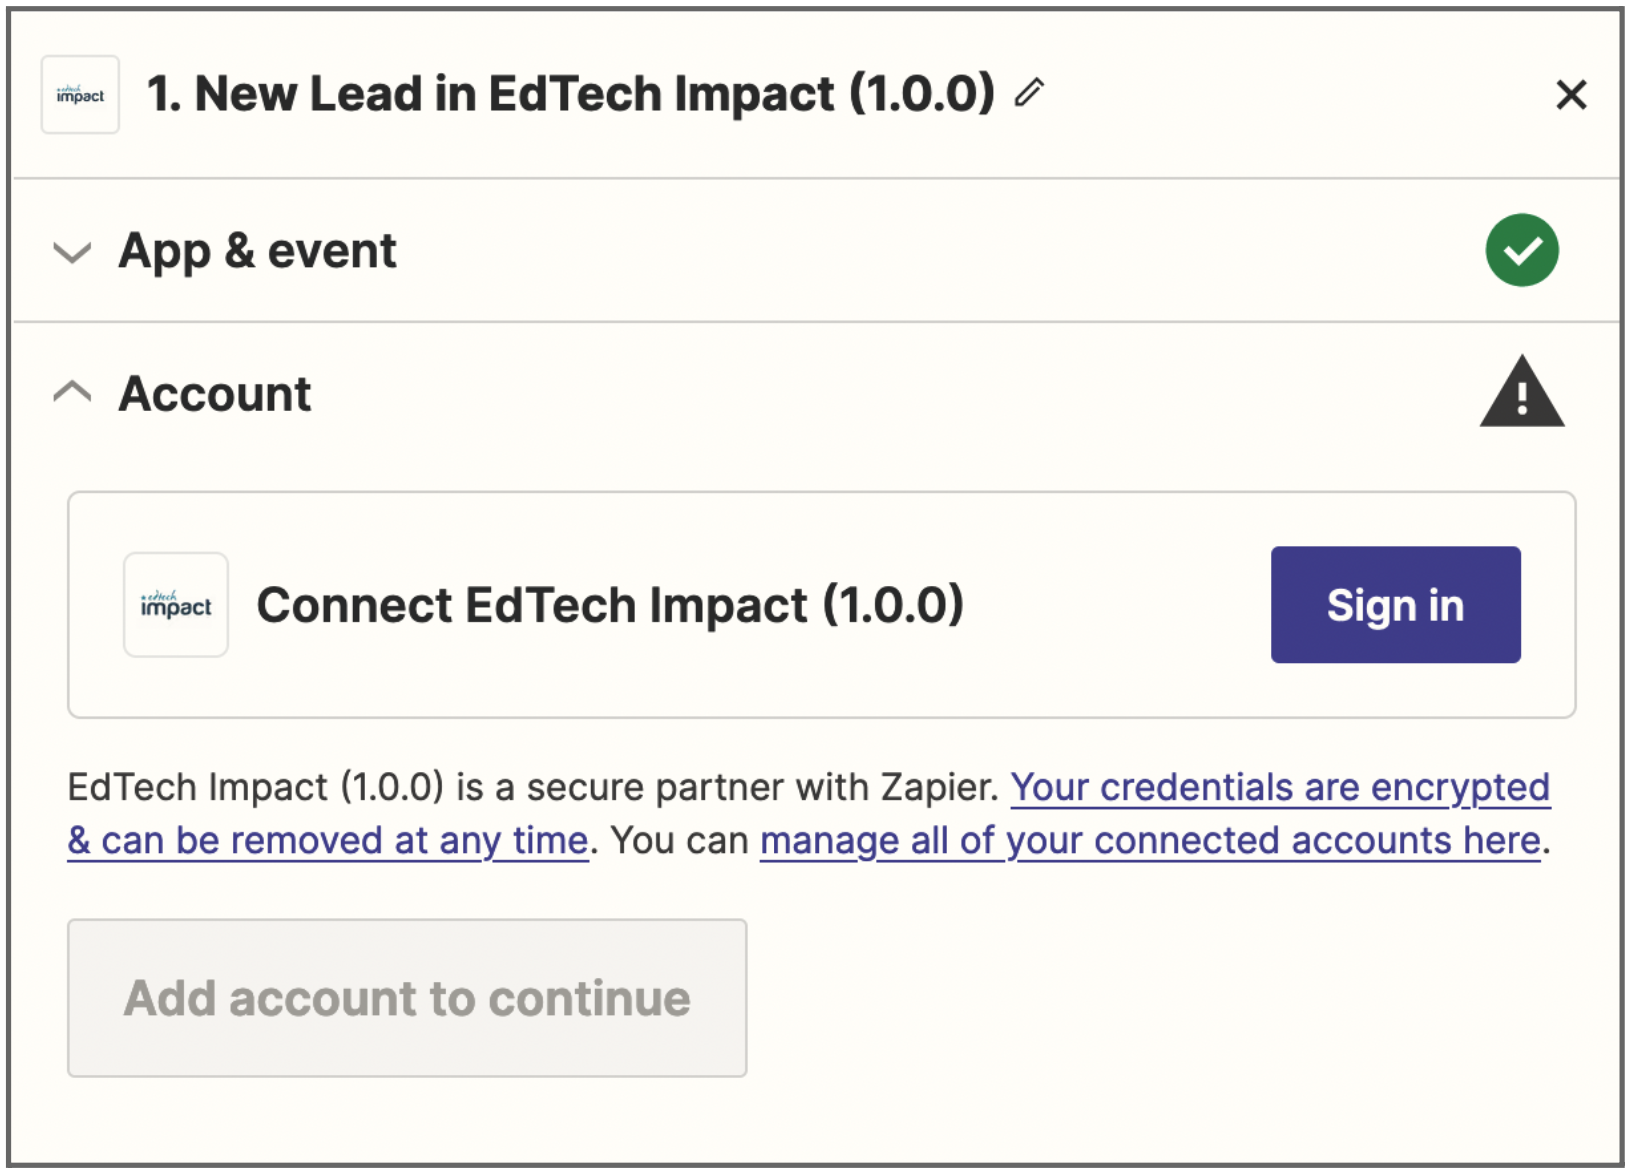
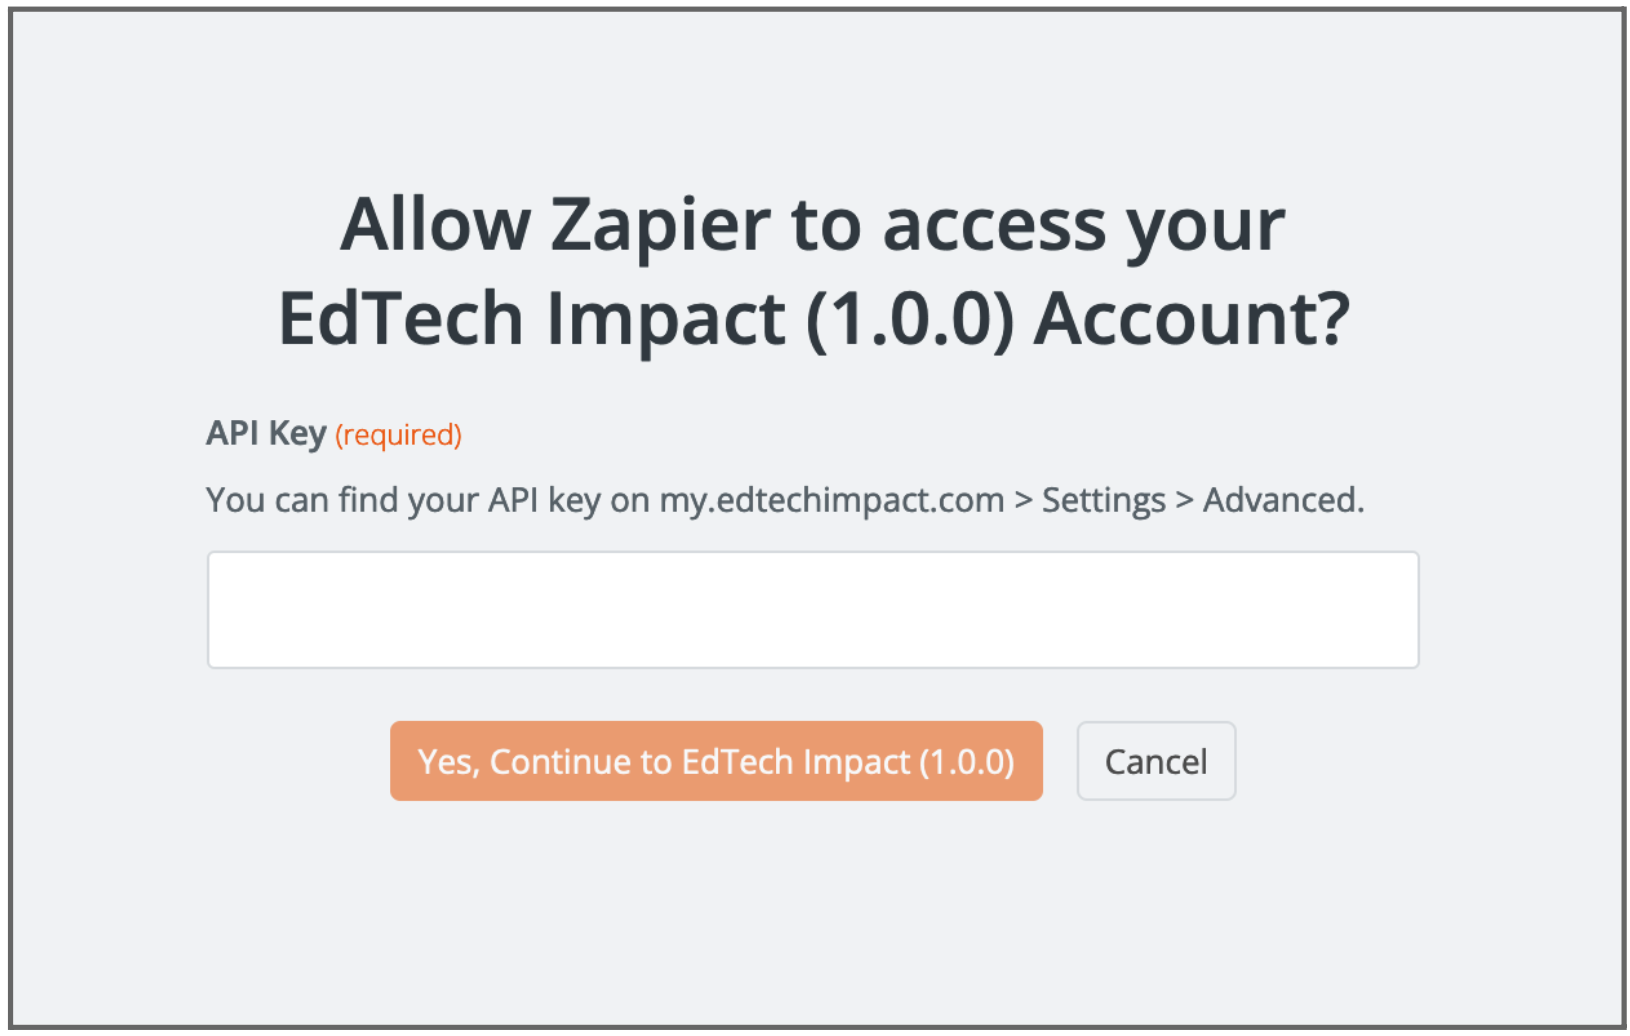
Hit “Sign in.” A new window will pop-up, directing you to input your EdTech Impact API key.
As instructed, this can be found on your EdTech Impact dashboard (Click on Settings, Advanced):
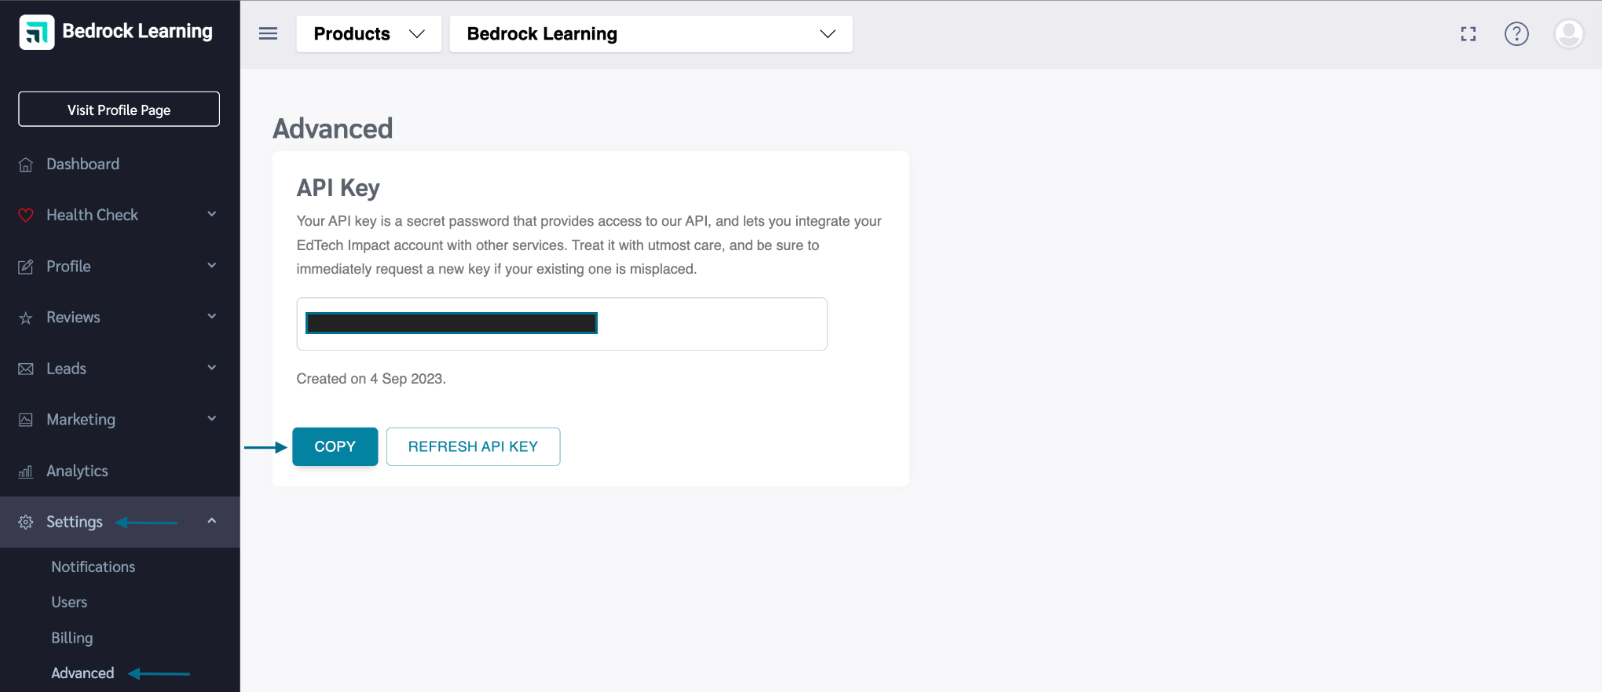
Use the “Copy” button to conveniently copy it to your clipboard and paste it into the popup window. Save this key, and Zapier will take you back to the setup process.
3D: Test your connection
To test that the API key works correctly, click on the three horizontal dots and look for “Test connection.”
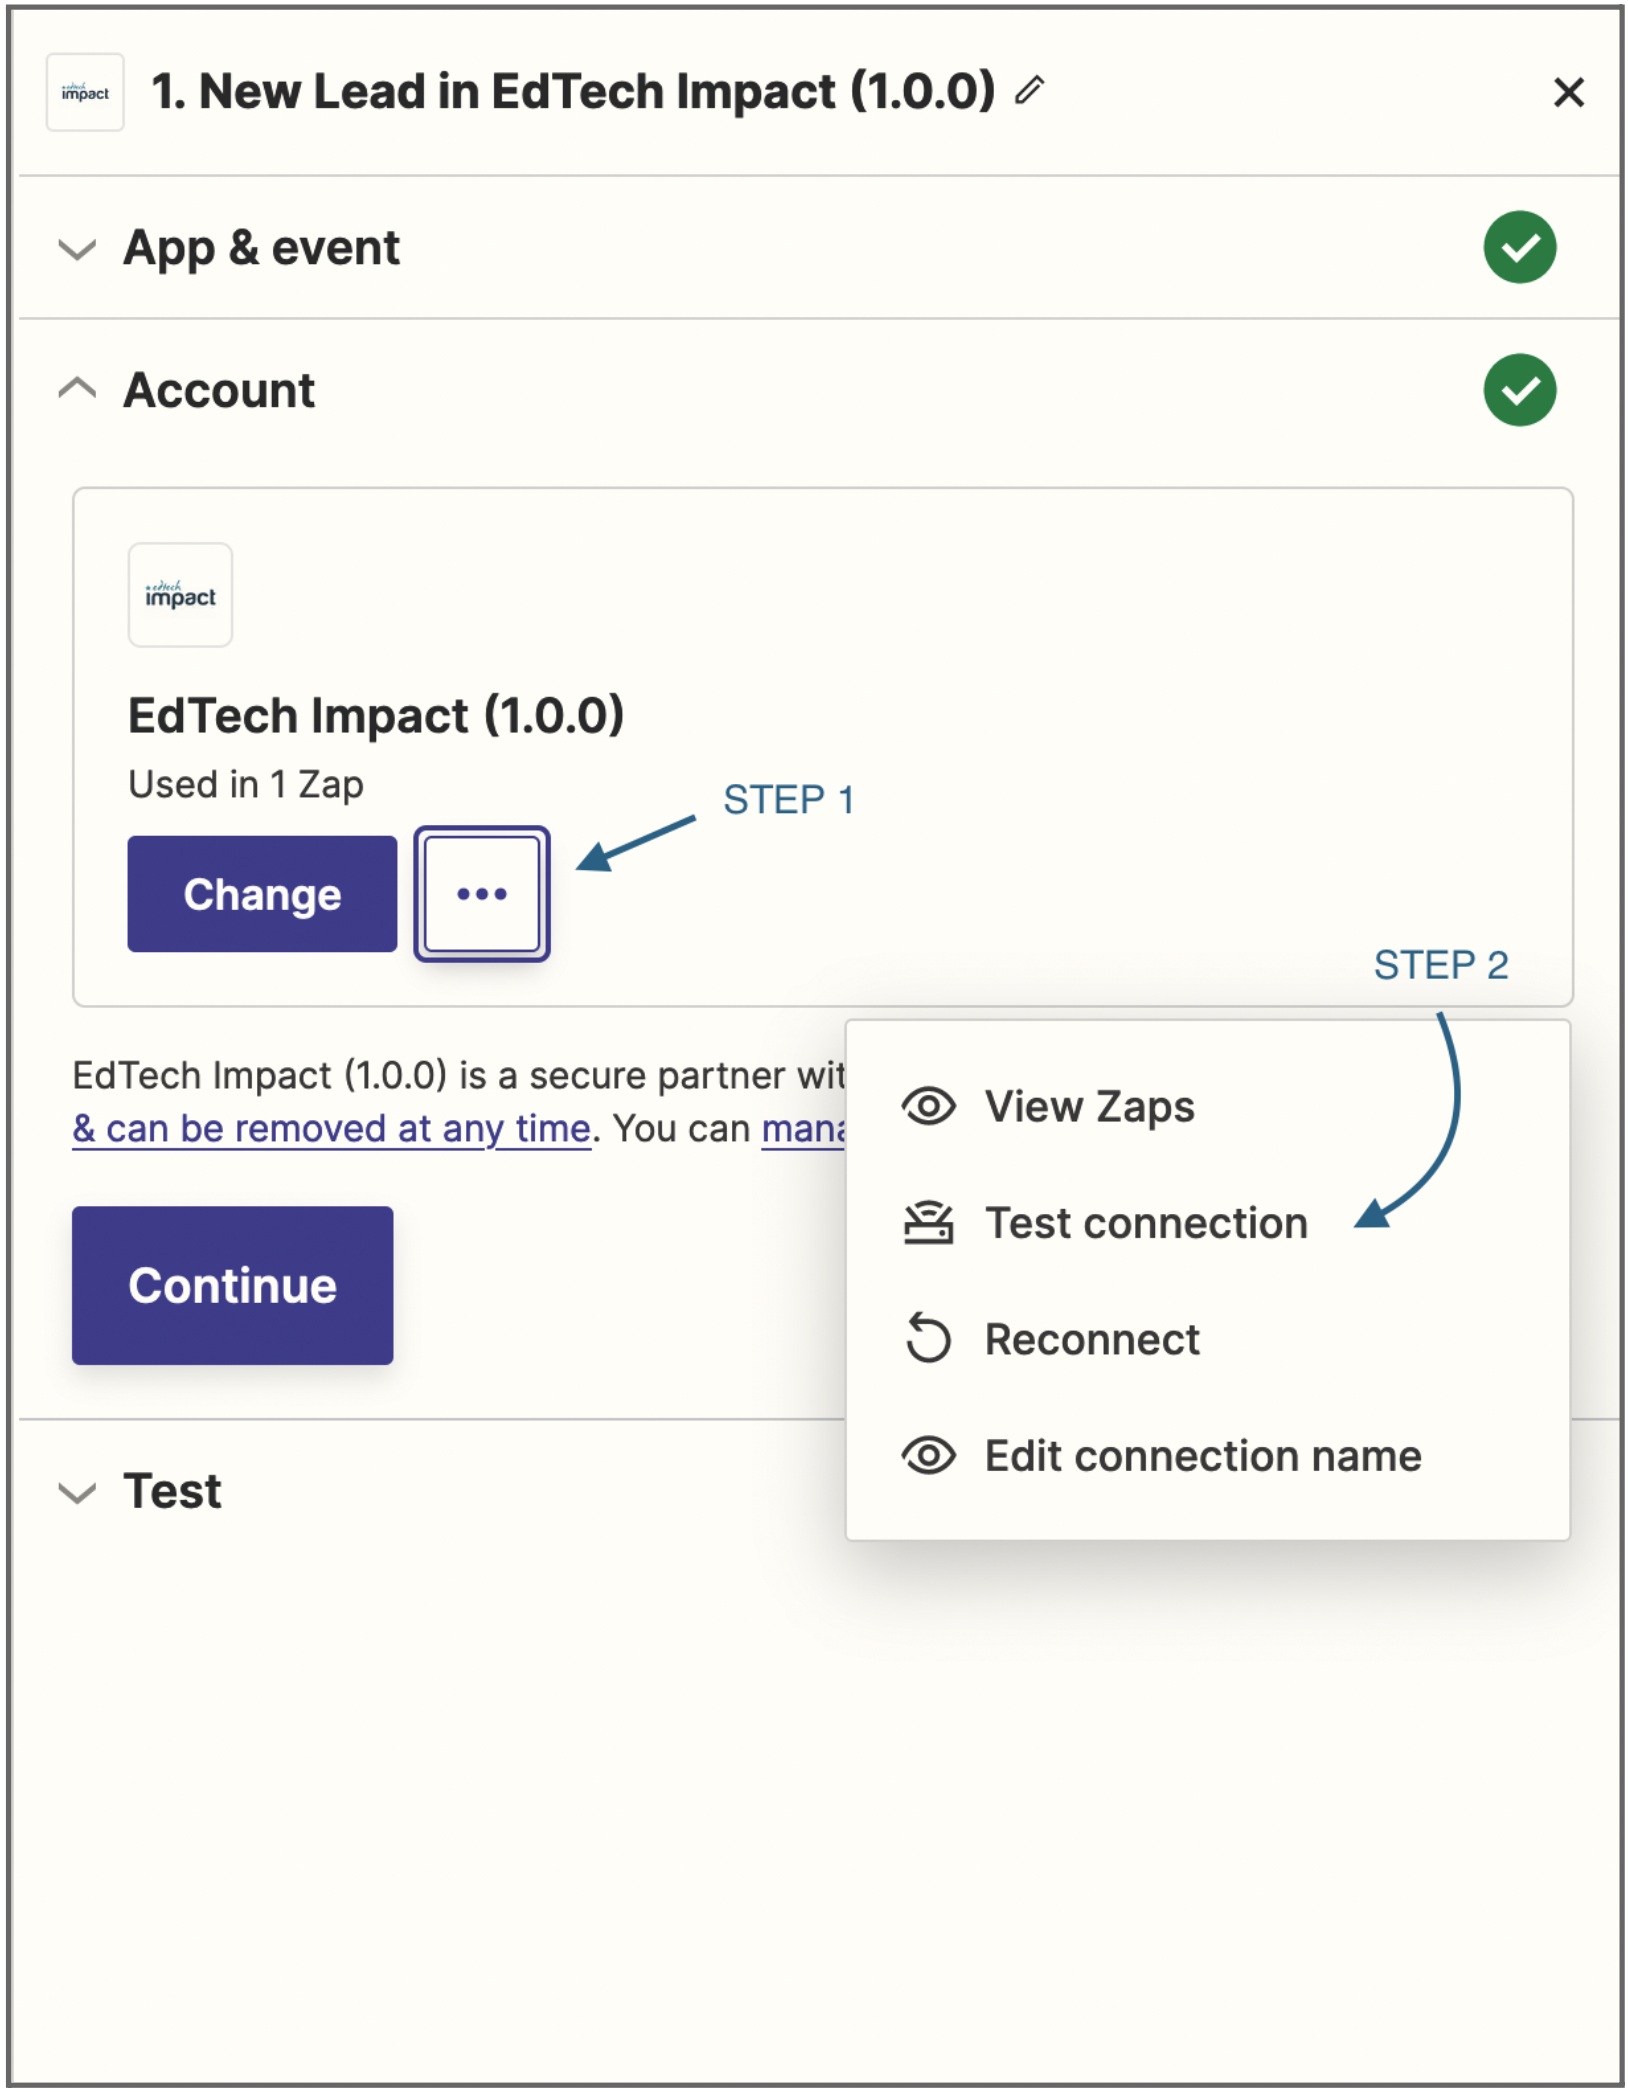
You should see Zapier tell you that the connection was successful. If you receive an error message, please contact us at hello@edtechimpact.com.
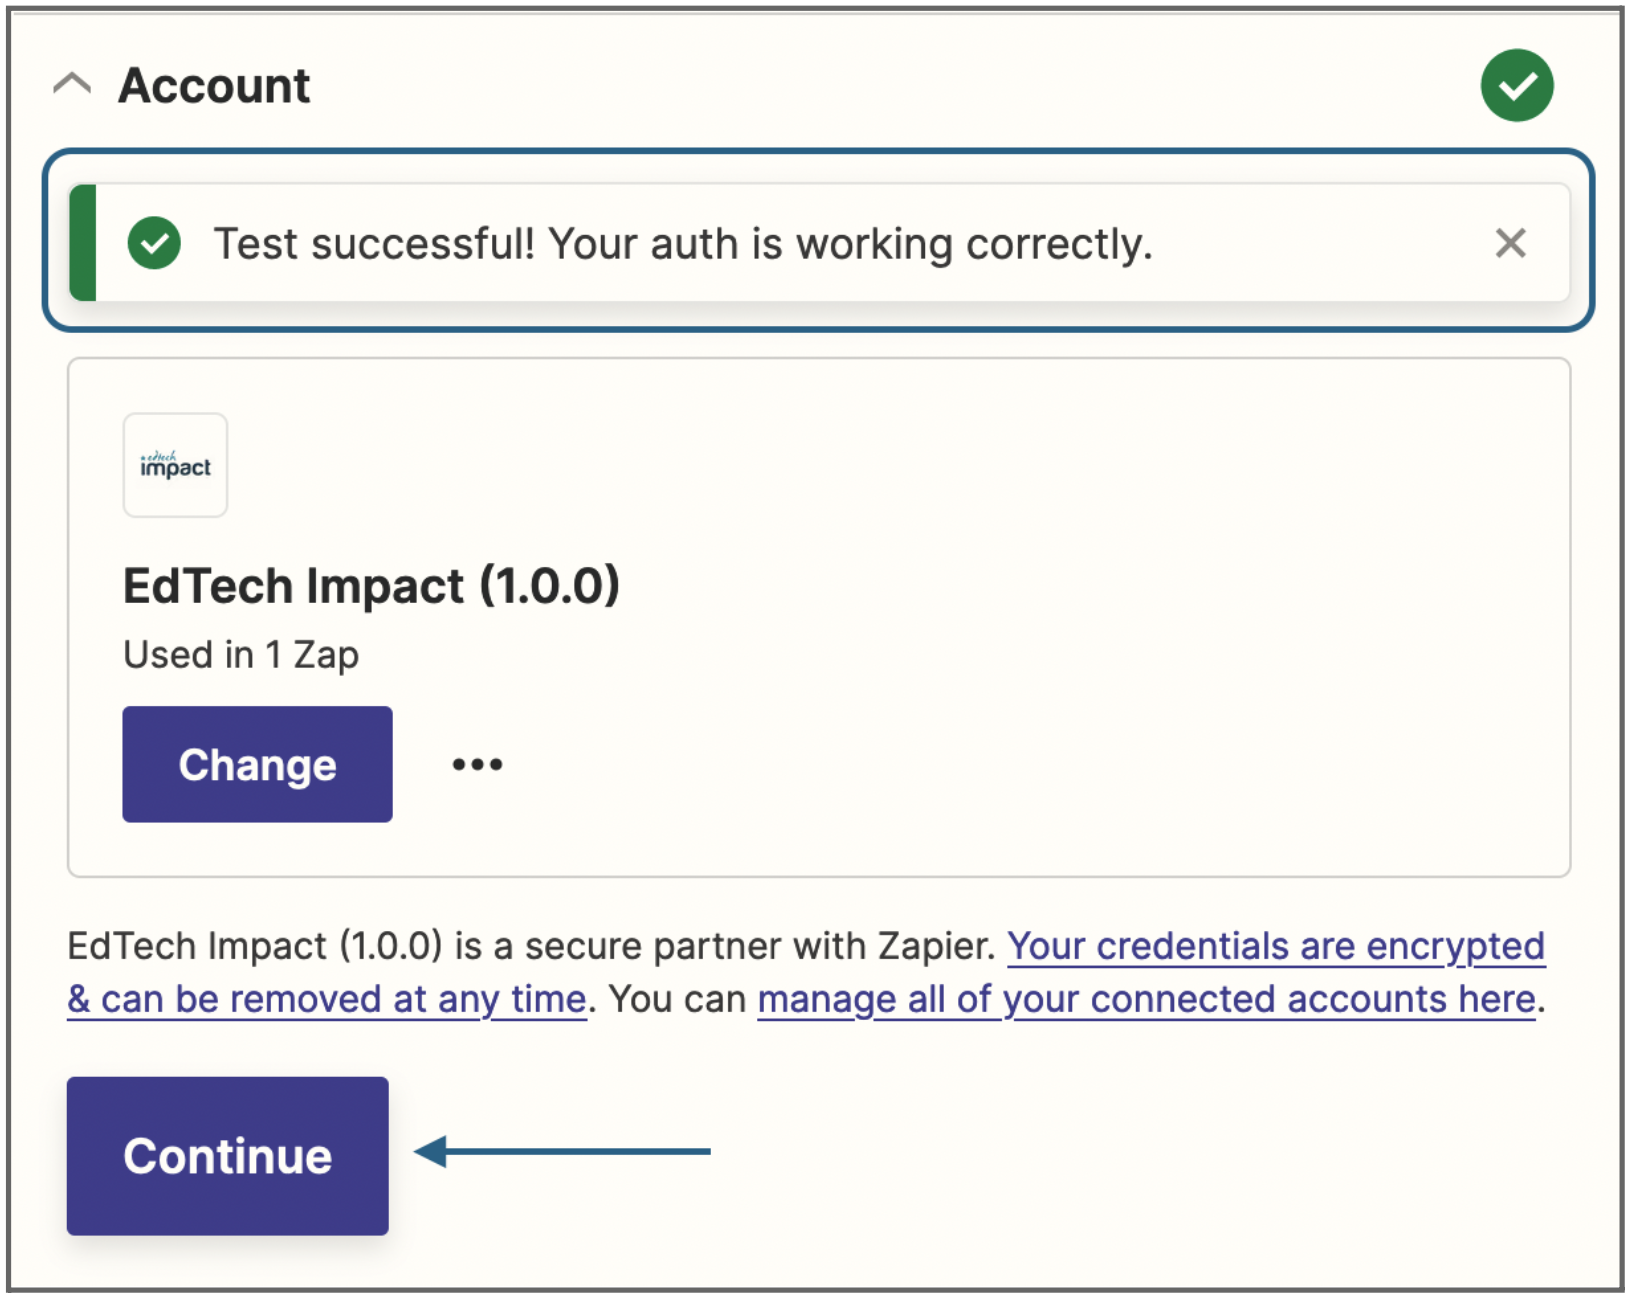
Finally, click “Continue.”
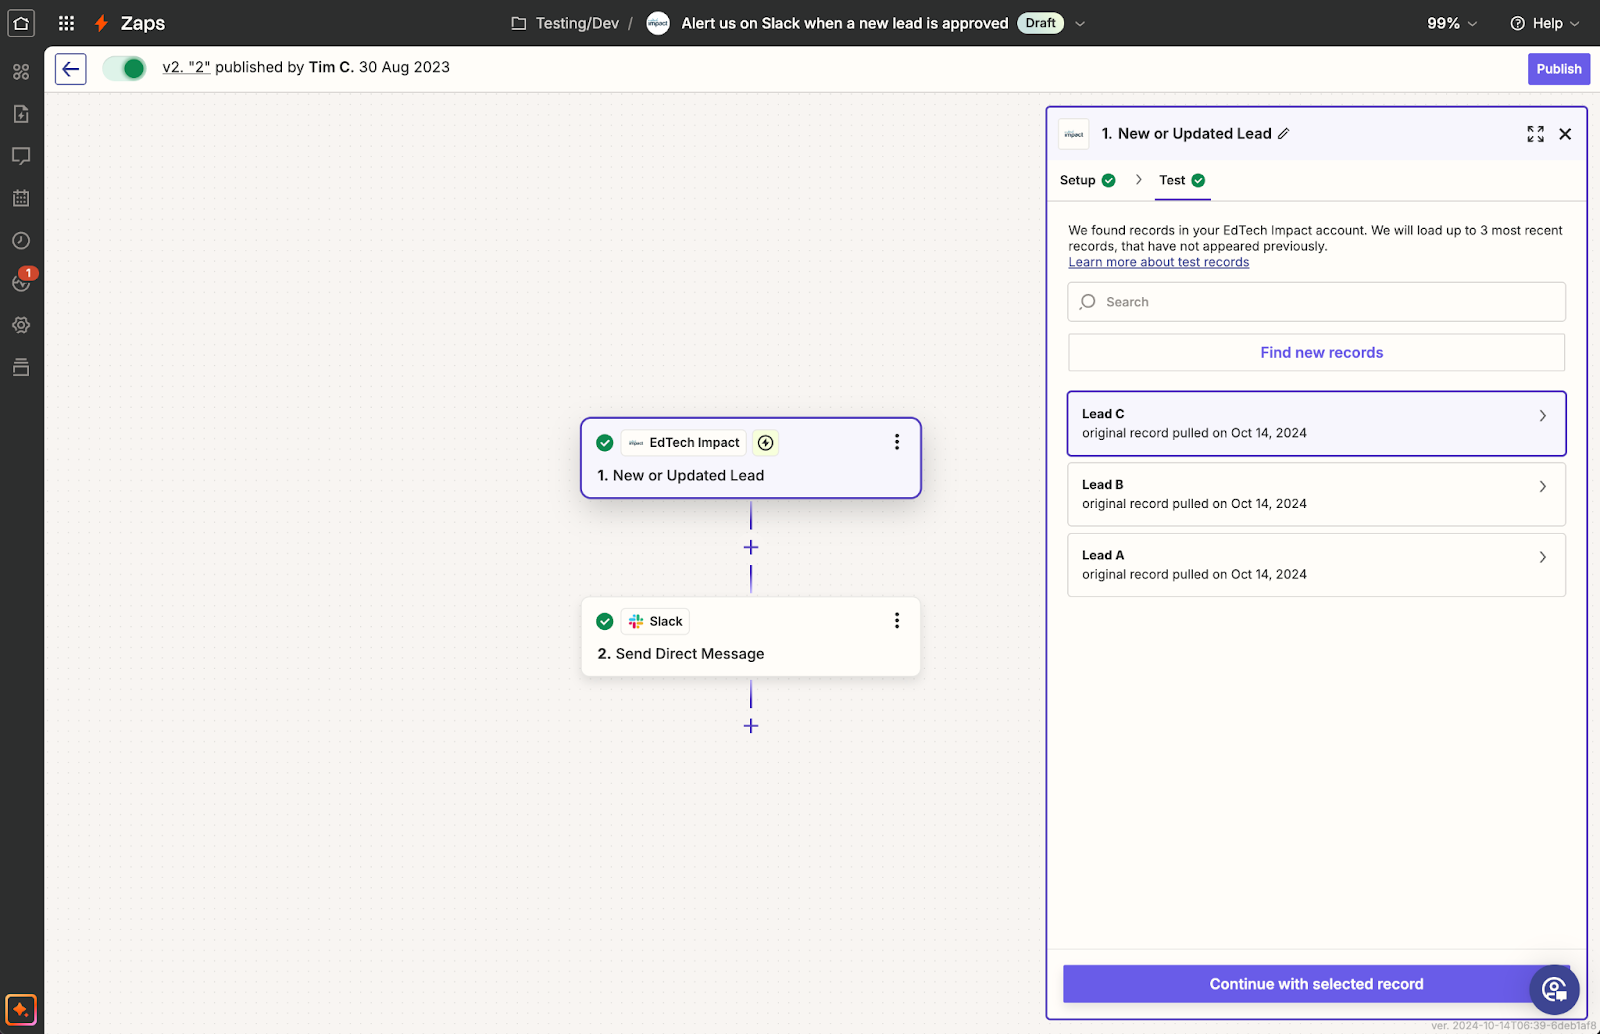
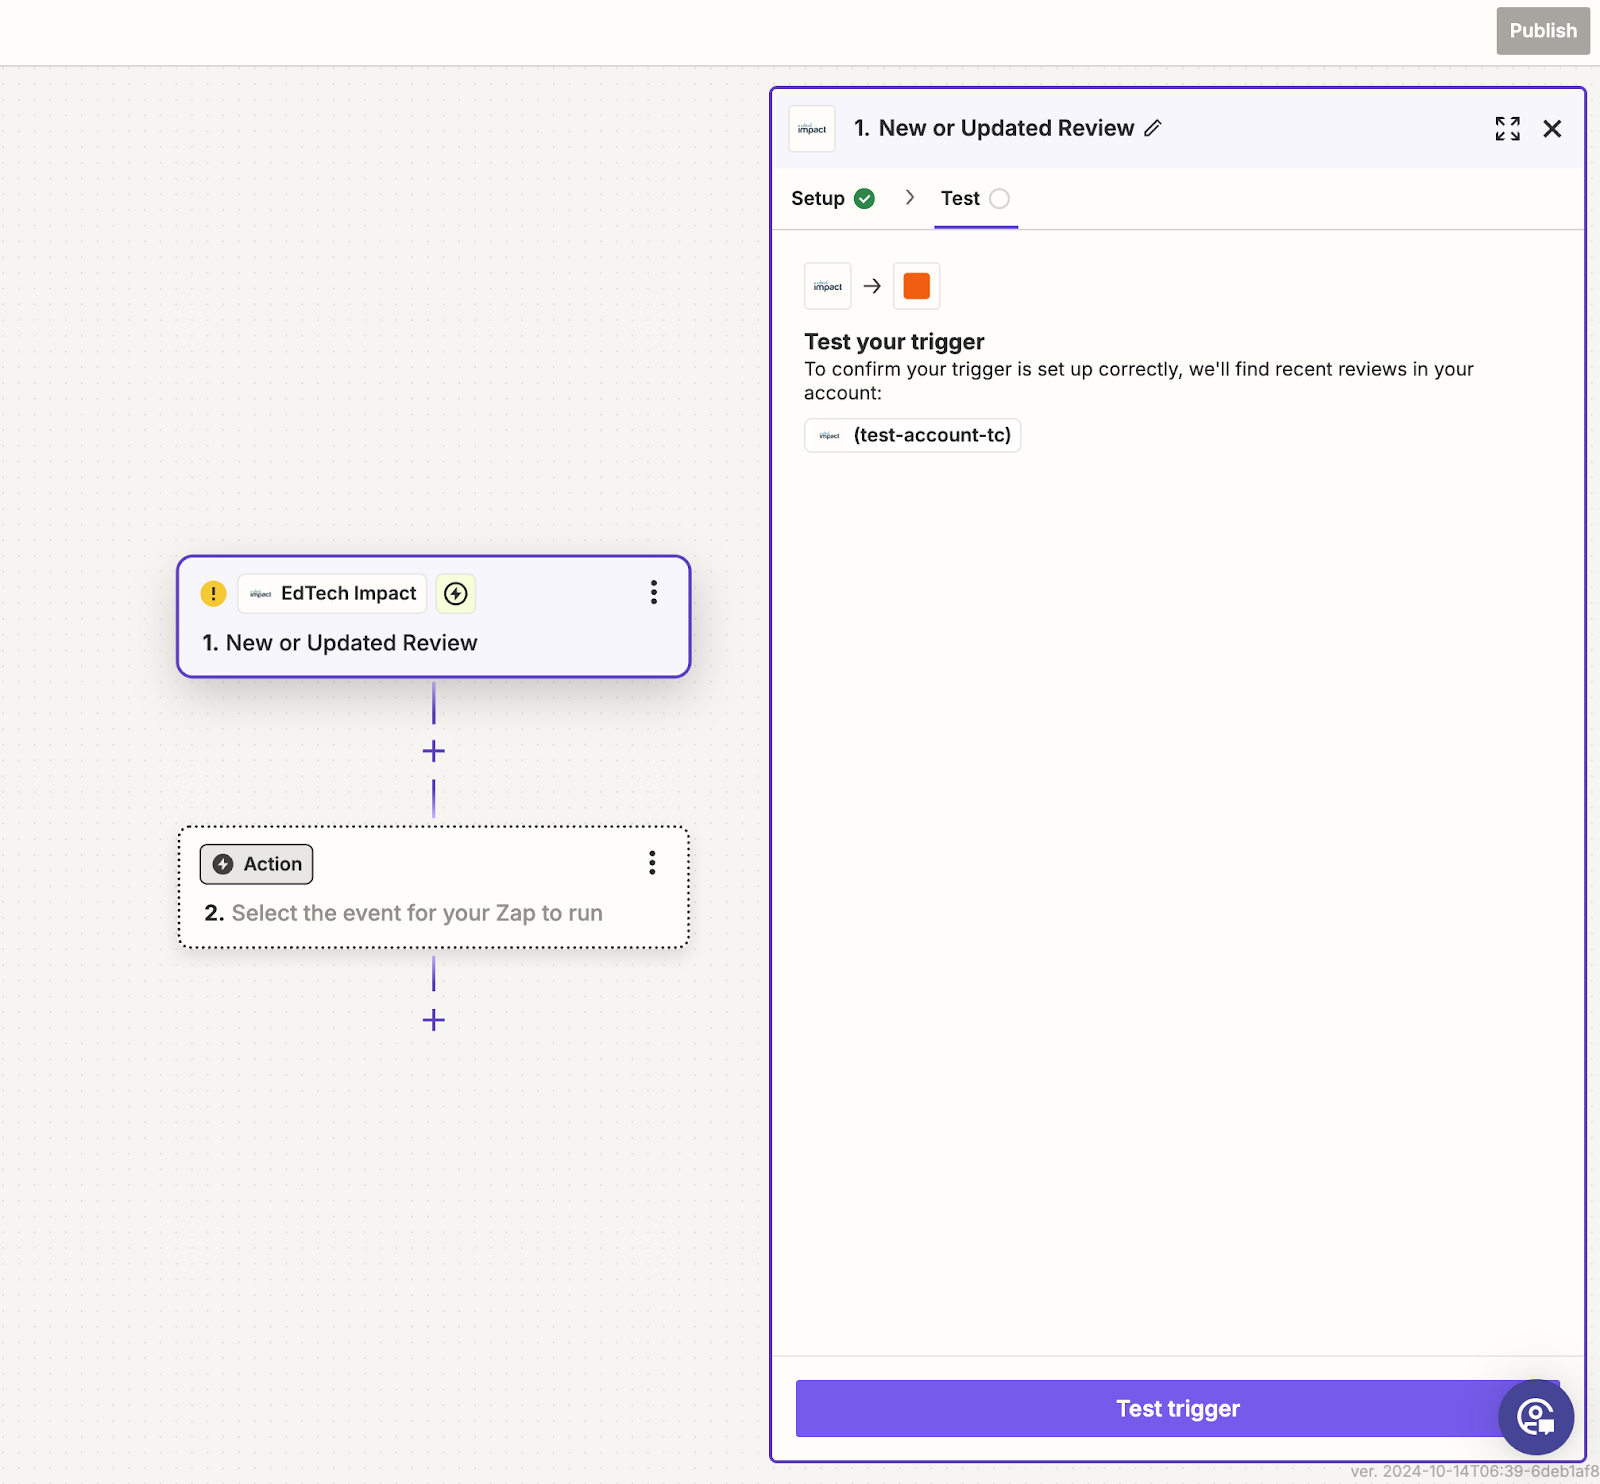
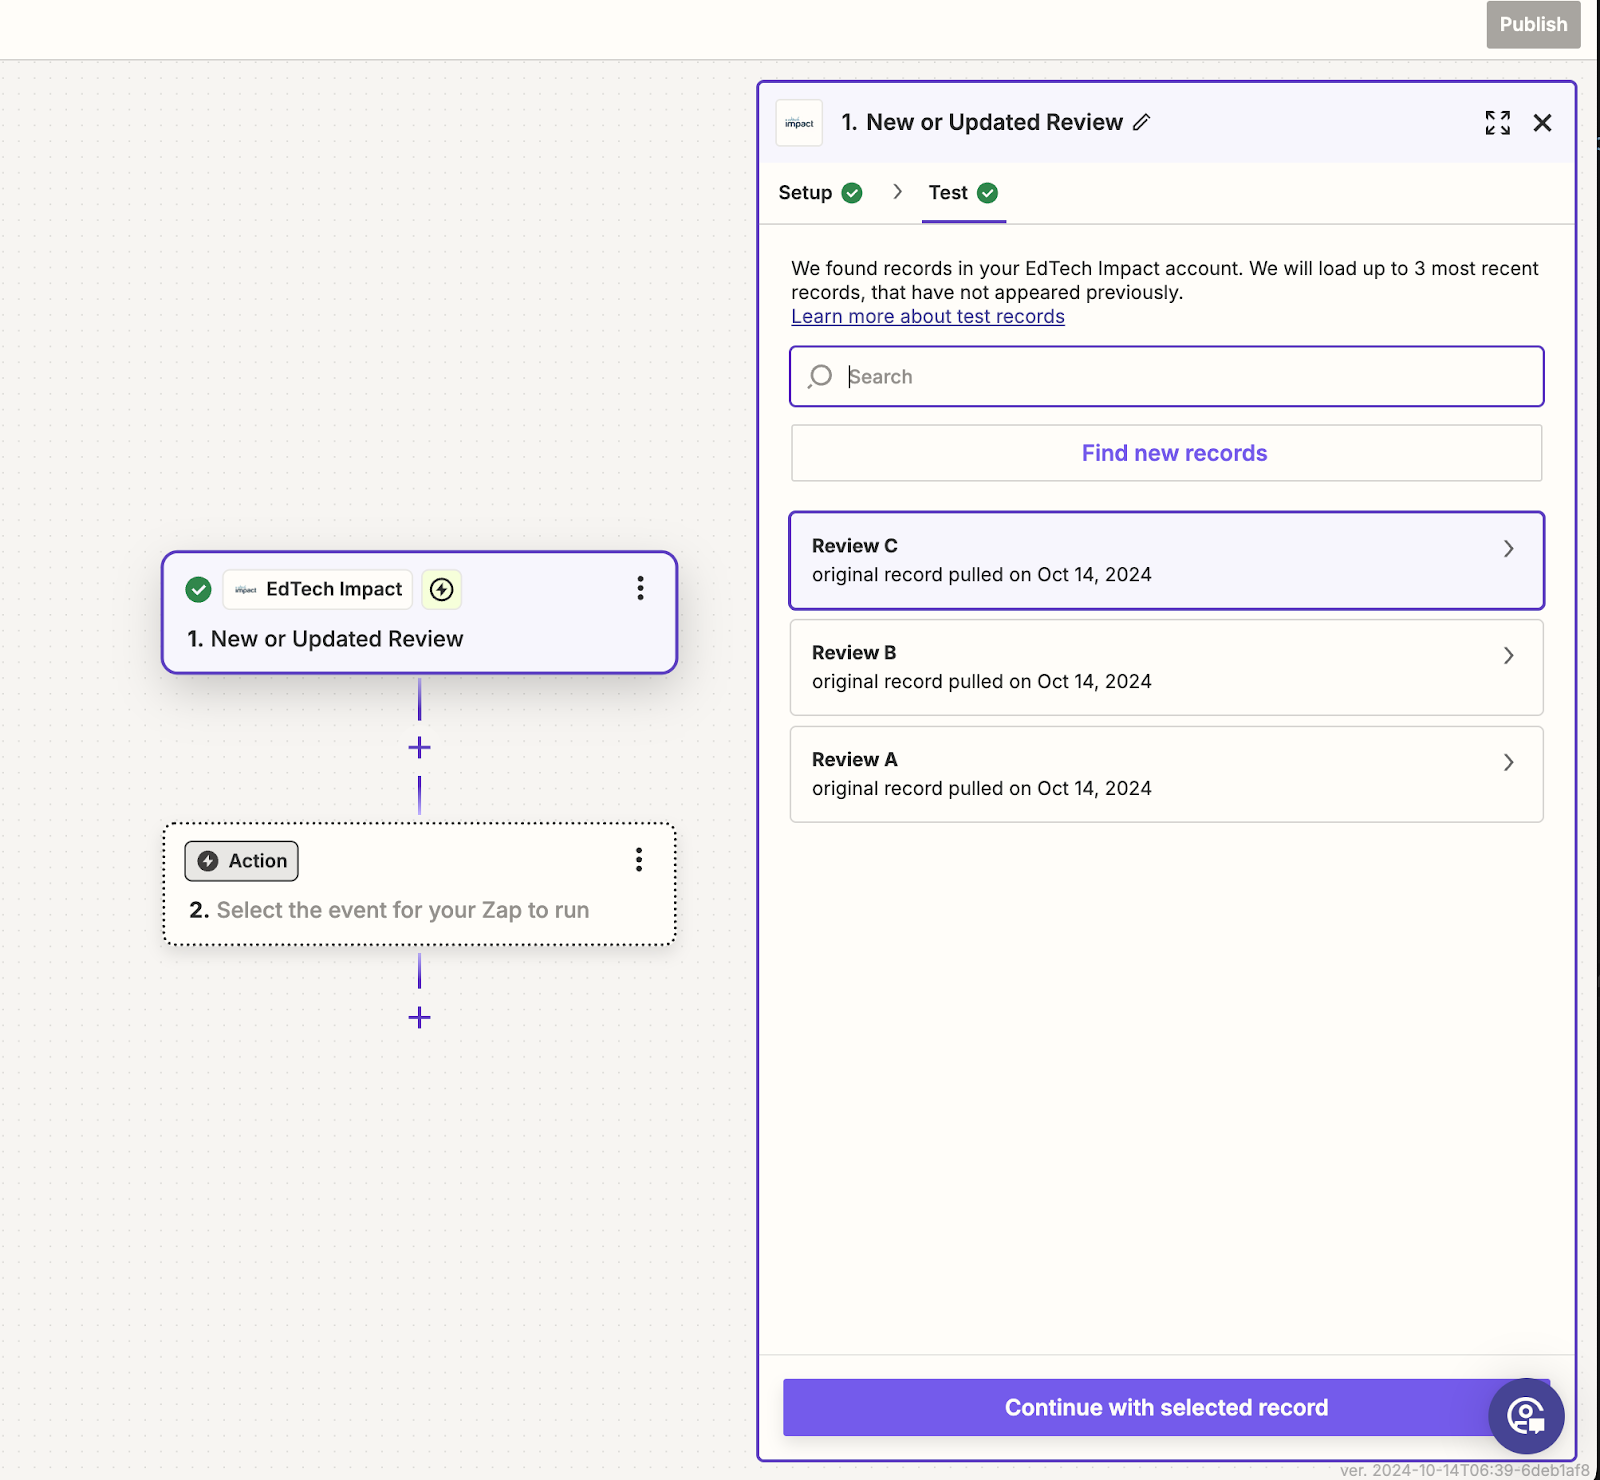
3E: Test with recent leads data
You should now be at the last step of the process:

Hitting the “Test trigger” button will use the data of the three most recent leads from your EdTech Impact account.
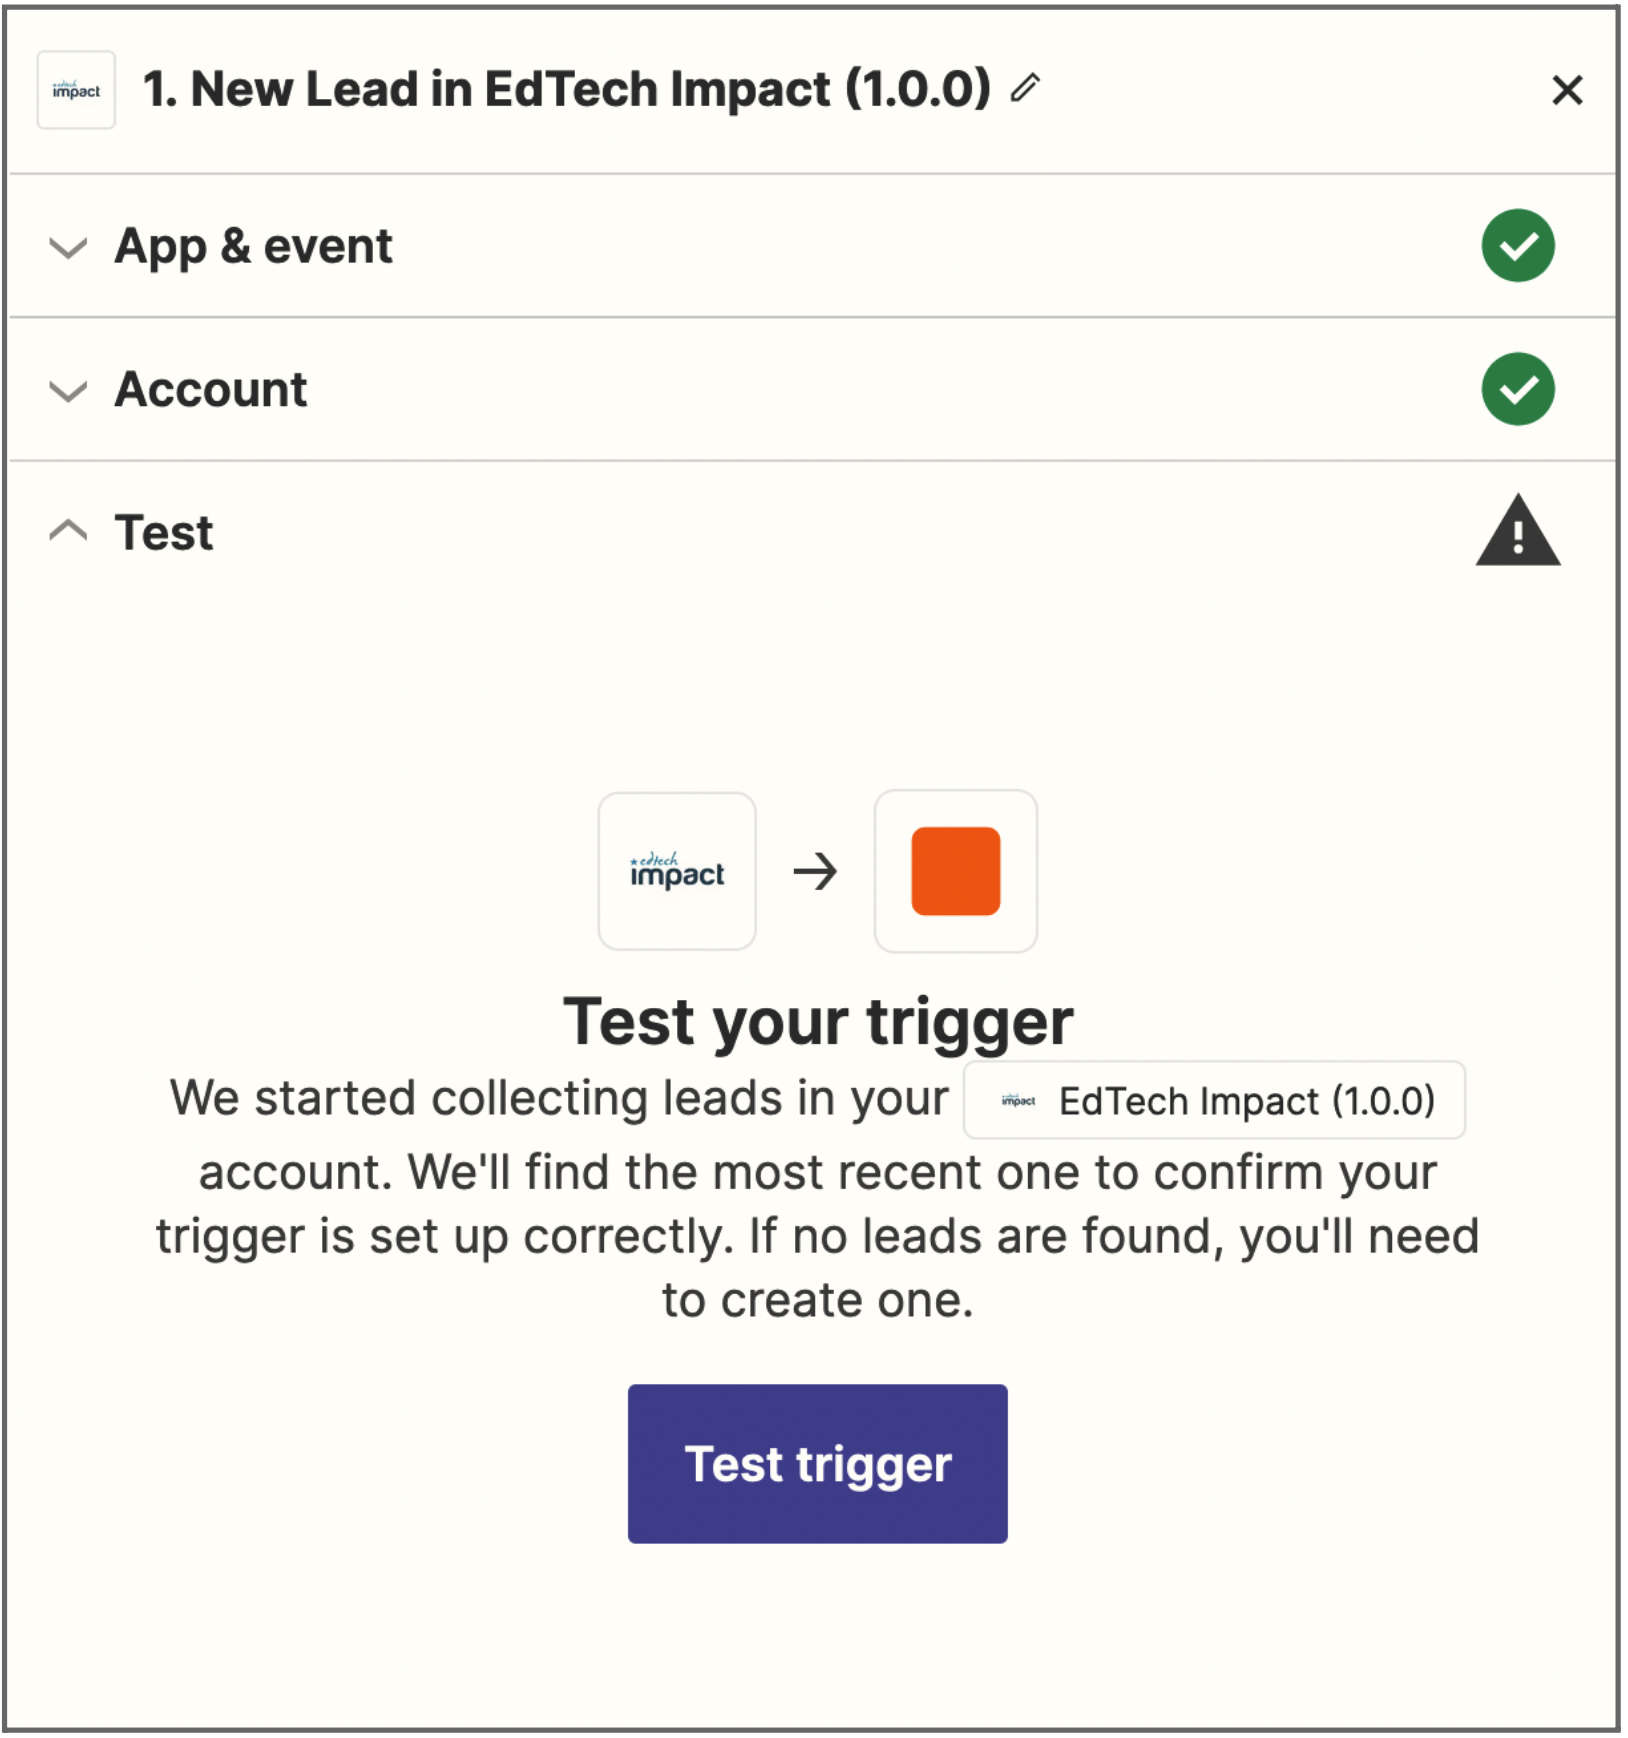
This is confirmation that everything is working correctly. Your setup with EdTech Impact is now complete.
Note: No new leads will appear in your CRM during this test. Only new lead submissions will come through as regular zap runs.
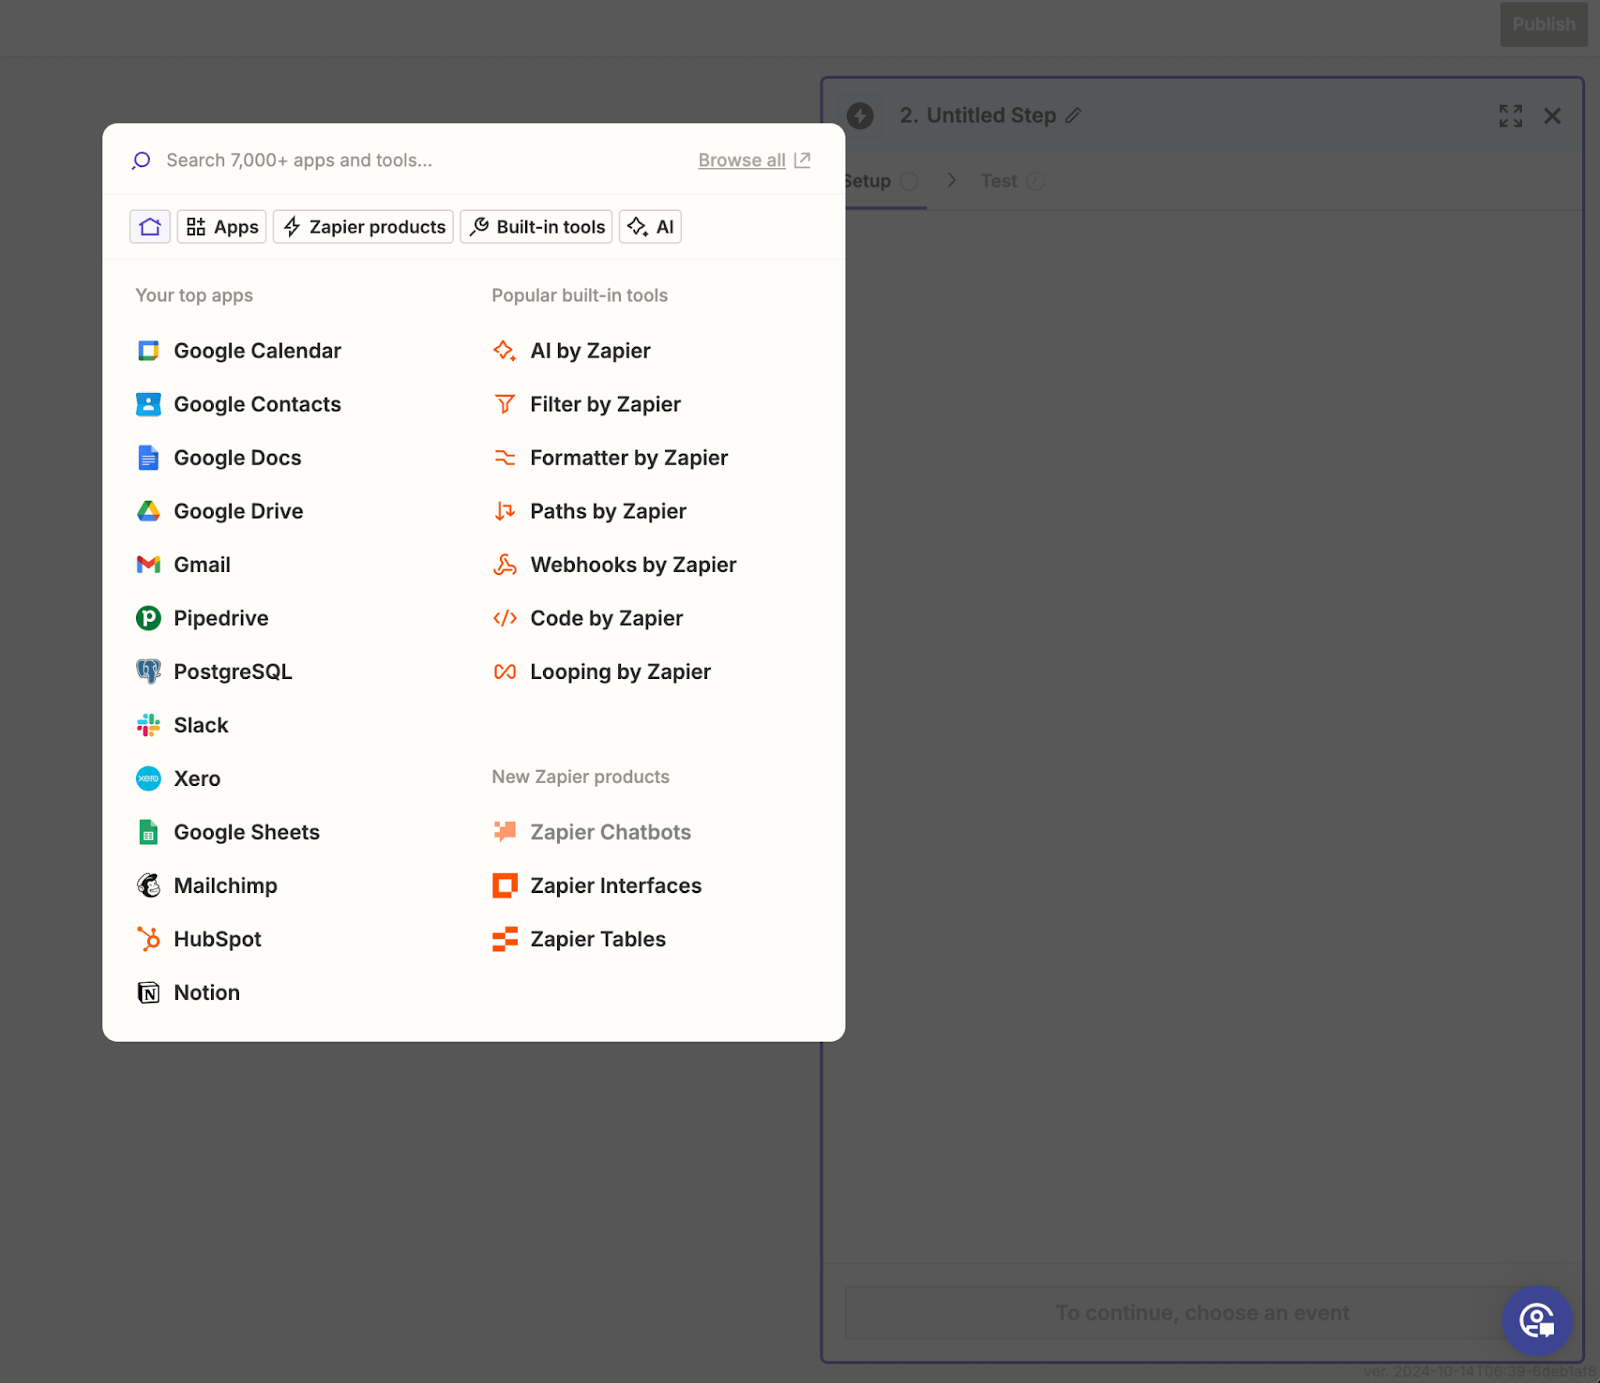
Clicking on “Continue with selected record” will take you to a pop-up, where you can select which app you want to integrate with.
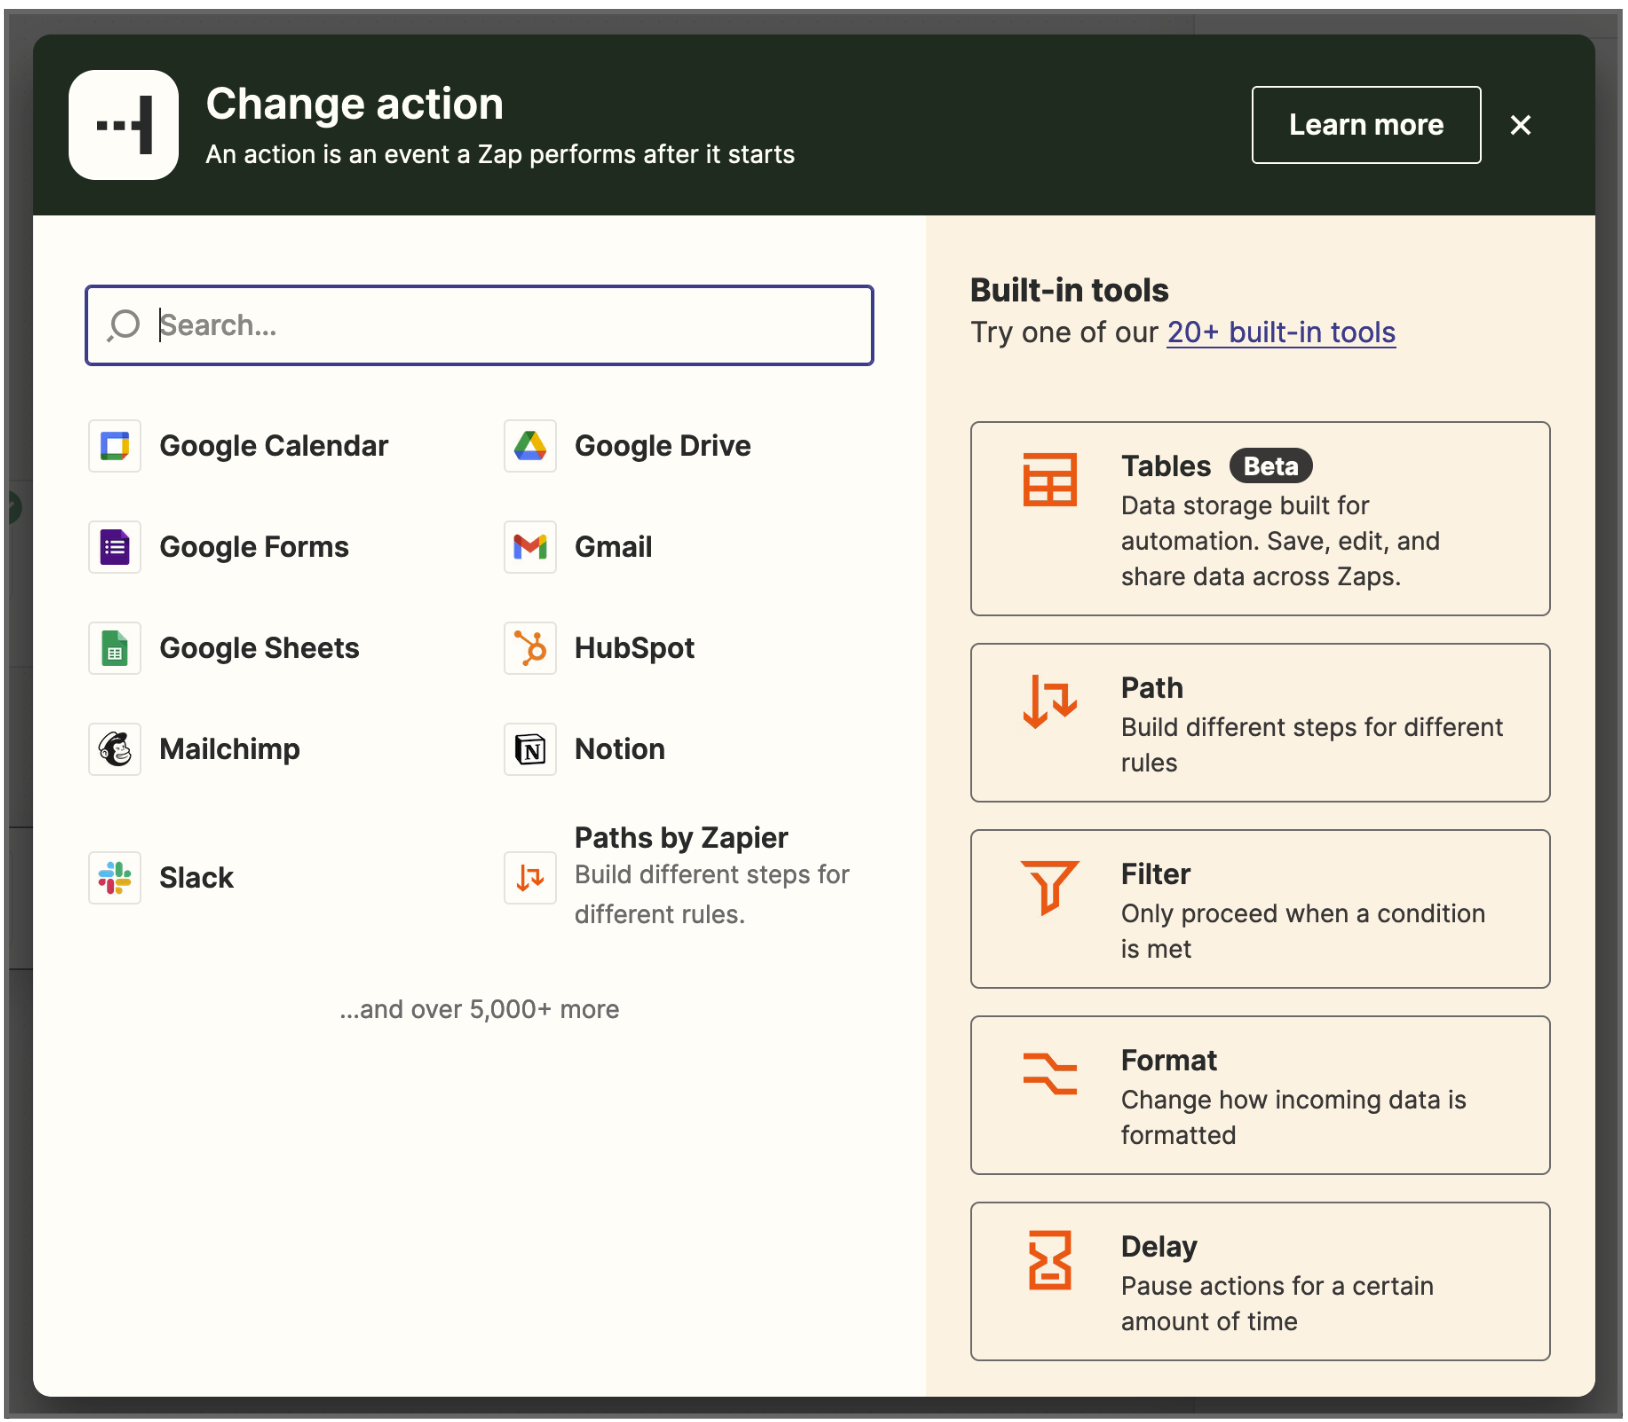
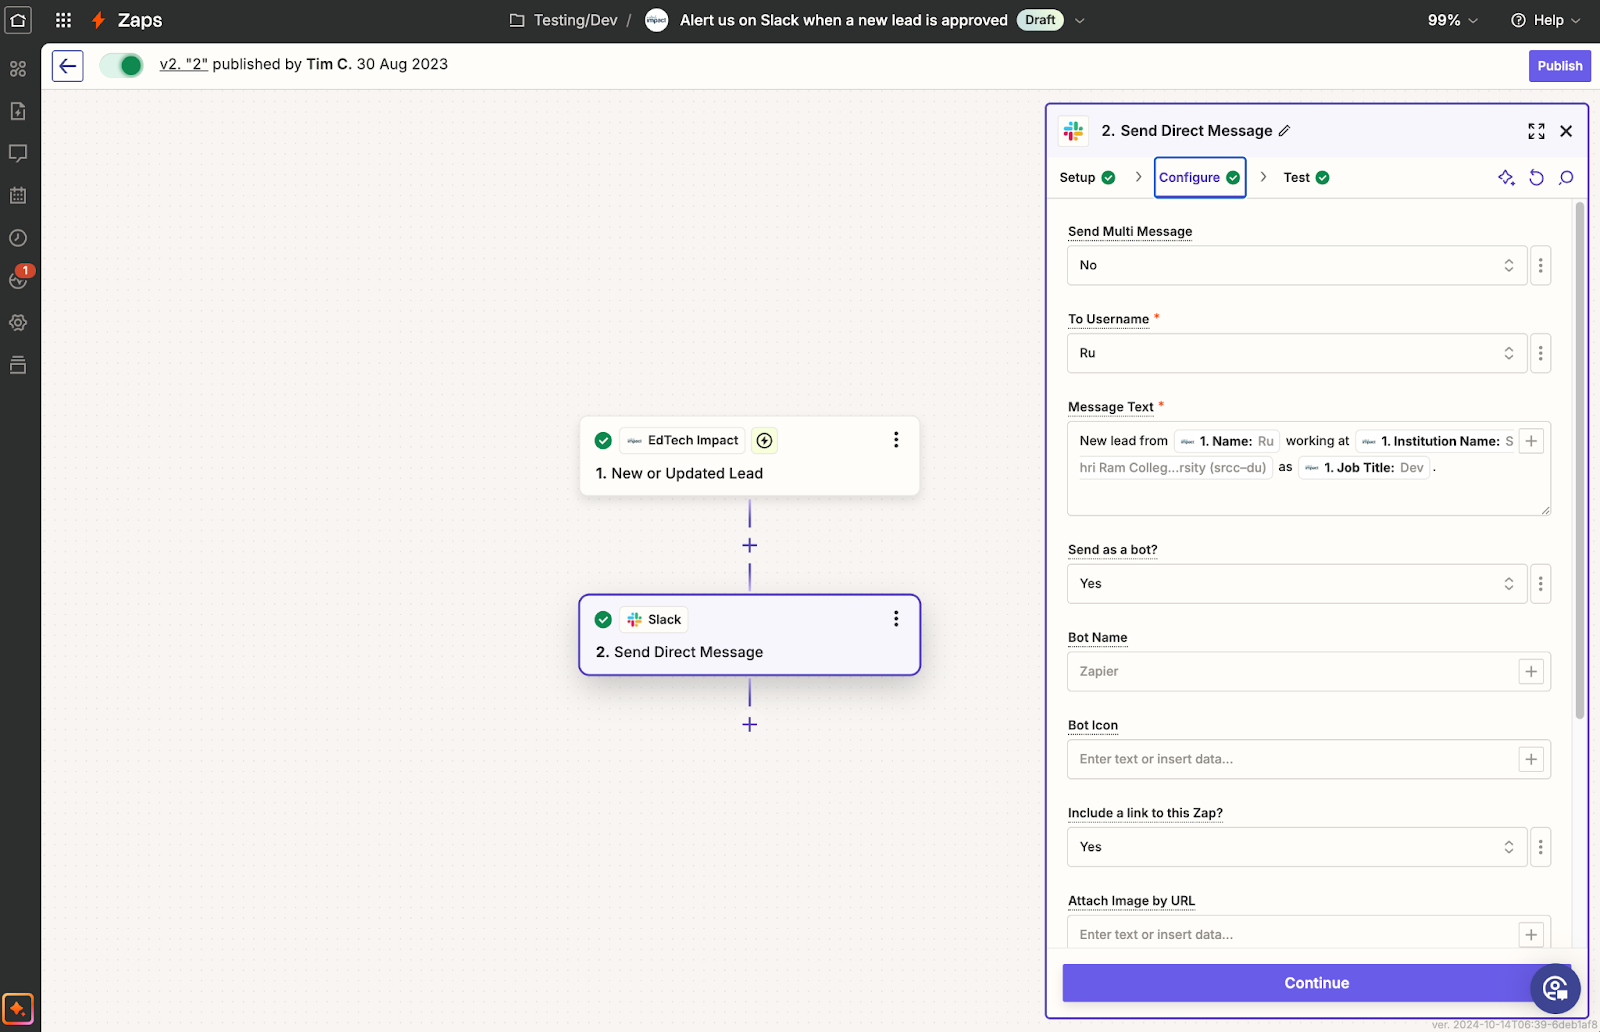
Step 4: Connect with the app of your choice
You now have thousands of apps to pick from and integrate with. Use the information provided by our system to populate:
● Your CRM such as Hubspot, Salesforce (may require a paid Zapier subscription), Pipedrive.
● Your instant messaging platform such as Slack, Microsoft Teams, Twist, Rocket.Chat.
● And more,
Note that, however, not all fields are present all the time. For example, phone and message fields are optional, and may be present in some leads but not in others.
Step 4: Set up your fields
Below, you can see the type of fields we are sharing as a part of your lead generation:
type:demo,trial,contact,2023 report,download,questionorigin:search-page,pricing,compare,used-before,url,product-sidebar,product-header,evidence,sticky-headerinstitution_type: free textinstitution_size: free text
inst_type and inst_size can have fixed values, but users can type in something else if the predefined options don’t fit them. So essentially, it is free text.
Updating existing integration to the new release
Step 1: Locate the Zap you want to update.
Open your Zapier dashboard, and locate the Zap you would like to update. Click on the right arrow at the end of the row.
 Step 2: Perform the update.
Now that you’re on the edit page, hover over the first tile where it says “EdTech Impact (1.0.0).” Clicking it should then bring up the edit panel in the right hand side.


This will slightly reset the setup portion of our integration, like so:

Ensure the “Trigger event” is still set to “New or Updated Lead.”
Open up the account selection dropdown by clicking on “Select” button next to the “Account” field: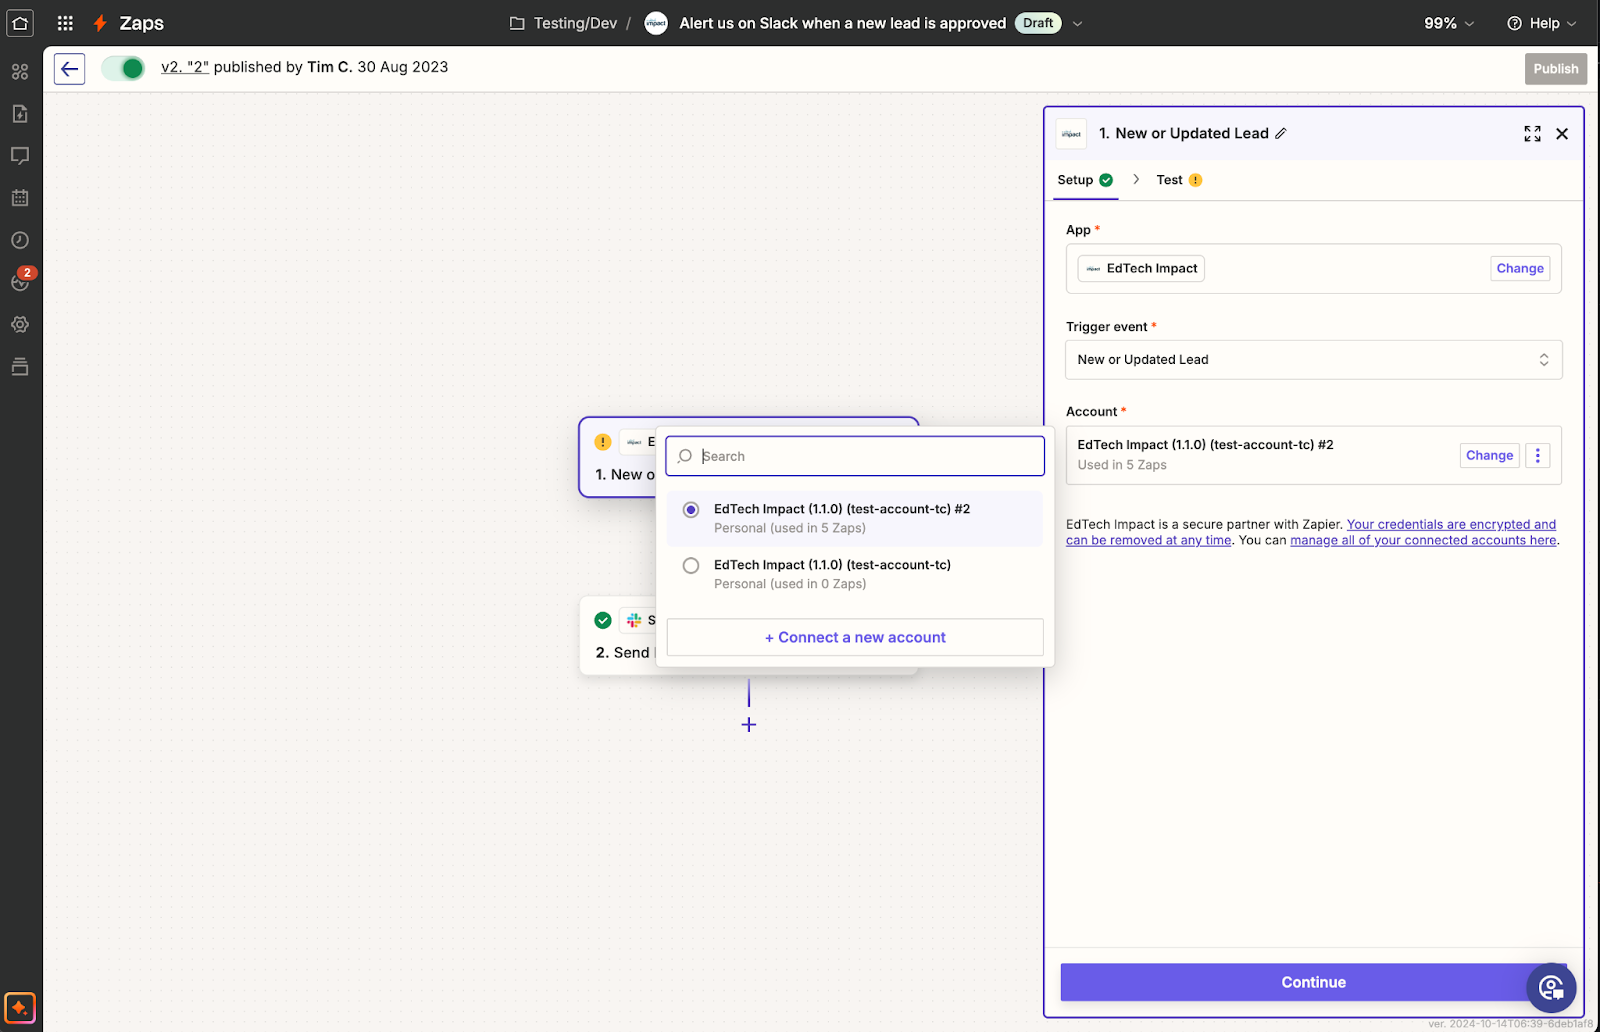
This will quickly re-connect Zapier and EdTech Impact.

From here on out, you’re free to re-configure your target app.
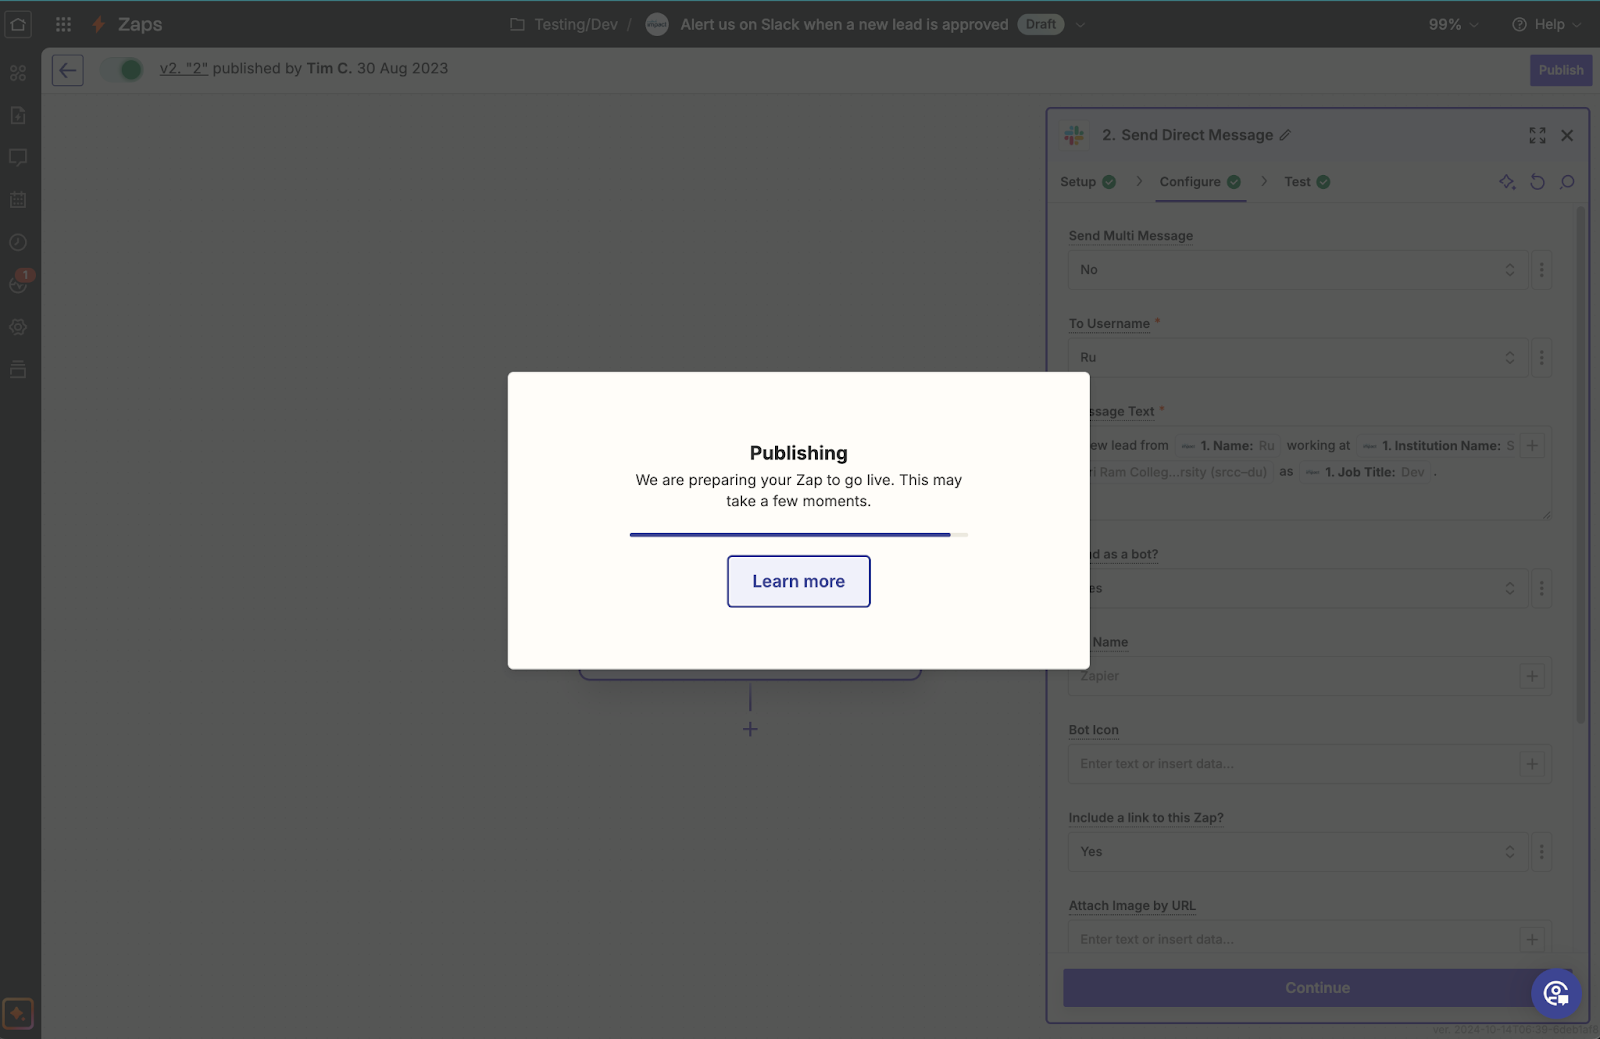
Step 3: Saving your changes.
Look for the “Publish” button in the top right corner. You’ll be asked to name the version.

Setting up reviews sync using our new release
Step 1: Create a new Zap.
In your Zapier account, click on the “Create” button, and then “New Zap.


 Step 2: Set up a connection.
If you already have used our integration before this for leads, you will have your “Account” field ready to go too:

Since we already have an account set up, we’re going to use that:
 Step 3: Connect with the app of your choice.
Clicking on “Continue with selected record” will allow you to then choose an app of your choice to set up the reviews integration.
- Your CRM such as Hubspot, Salesforce (may require a paid Zapier subscription), Pipedrive.
- Your instant messaging platform such as Slack, Microsoft Teams, Twist, Rocket.Chat.
- and so on.
Changelog
Version 1.1 (2024-10-11)
- You will receive additional data in leads:
- An ID field to uniquely identify a lead.
- Product name and slug for visual identification in case you have multiple products with us.
- Feedback status: When EdTech Impact follows up with your prospective buyers, they may respond with their intent. This will show up as well. Possible values include: Planning to purchase, The trial has been set up, Still evaluating the benefits, Need an alternative solution, Not interested in anything, Too expensive, Still evaluating, Need alternative quotes, Not purchasing anything
- We now support reviews. Possible values for certain fields are shared below:
- length_of_use: 0–3 months, 4-6 months, 7–12 months, 1-2 years, 3-4 years, 5 years+
- usage: Daily, Weekly, Monthly, Occasionally
Version 1.2 (2024-12-11)
- You will receive additional data in leads. Possible values for new fields are shared below:
- educator_schedule_intent: NEXT_WEEK, NEXT_MONTH, IN_3_MONTHS, IN_6_MONTHS, IN_12_MONTHS
Planned/upcoming
- Leads
- Pass along source of the lead: Direct, Email, Event, Other (Alternative Lead)
If you have any feedback or require help with any of the above, please contact us at hello@edtechimpact.com and we will walk you through the process over a screen share.